
Welcome to the definitive guide for keeping your wooden floors looking their absolute best. If you've ever wondered how to clean wood floors properly, the secret isn't complicated. It boils down to a simple, consistent routine: a quick daily dust-up to get rid of abrasive grit, followed by an occasional damp mop with a gentle, pH-neutral cleaner. The golden rules? Avoid soaking your floors and stay away from harsh chemicals. That’s how you preserve your floor’s finish and integrity for the long haul.
Why Proper Wood Floor Care Matters
Wooden floors are so much more than just a surface to walk on; they're a key feature that brings warmth, character, and real value to a home. It's no surprise their popularity is soaring. The global wood flooring market is expected to grow from $53.14 billion in 2024 to $56.39 billion in 2025, largely thanks to a boom in home renovations. This just goes to show how many of us are investing in beautiful wood floors and, in turn, why knowing how to look after them is more important than ever.
Getting the cleaning approach right isn’t just about looks. Get it wrong, and you could be facing some serious, and seriously expensive, damage.
The Risks of a Wrong Approach
Using the wrong tools or cleaning products can cause far more harm than good. A stiff-bristled broom, for instance, can easily leave a network of micro-scratches on the surface. Harsh, abrasive cleaners or acidic solutions like straight vinegar can completely strip the protective finish from your floorboards. Once that barrier is gone, the wood is left exposed and vulnerable to moisture, stains, and a dull, lifeless appearance.
Even something as simple as water becomes a major threat when used incorrectly. A soaking wet mop or a steam cleaner forces excessive moisture into the wood, which can cause the planks to swell, warp, or cup. This kind of damage is rarely a simple fix and often requires costly professional repairs. For floors that have already seen some neglect, professional help is often the only way back. You can learn more about the benefits of a professional wood floor restoration to see how experts can revive even heavily damaged surfaces.
Building Good Habits for Lasting Floors
The whole point of this guide is to help you build a sustainable care routine, not just offer quick fixes. By adopting the right habits, you can dramatically extend the life and beauty of your flooring.
The most effective strategy for wood floor maintenance is prevention. Regular, gentle cleaning is far better than infrequent, aggressive scrubbing. A few minutes each day prevents the build-up of damaging grit and grime.
To help you get started, here's a quick reference table. Think of it as your cheat sheet for everyday wood floor care.
Quick Guide to Cleaning Your Wood Floor
This table summarises the essential actions and tools you'll need to keep your wood floors in top condition safely and effectively.
| Action | Tool/Product | Frequency | Key Tip |
|---|---|---|---|
| Dusting/Sweeping | Microfibre mop or soft-bristle broom | Daily | Removes surface grit that can scratch the finish. |
| Vacuuming | Vacuum with a hard-floor head | 1-2 times weekly | Ensure the beater bar is turned off to avoid scratching. |
| Damp Mopping | Microfibre mop & pH-neutral cleaner | Bi-weekly or monthly | Wring the mop out until it's almost dry to the touch. |
| Spot Cleaning | Soft cloth & approved cleaner | As needed | Tackle spills immediately to prevent staining and damage. |
This guide is written with UK homeowners in mind, tackling common issues like dealing with floors in our damp climate and choosing products that are safe for the whole family, pets included. We'll walk you through everything from building the perfect cleaning kit to mastering the techniques the pros use. With this knowledge, your floors will remain a stunning centrepiece in your home for years to come.
Assembling Your Wood Floor Cleaning Toolkit
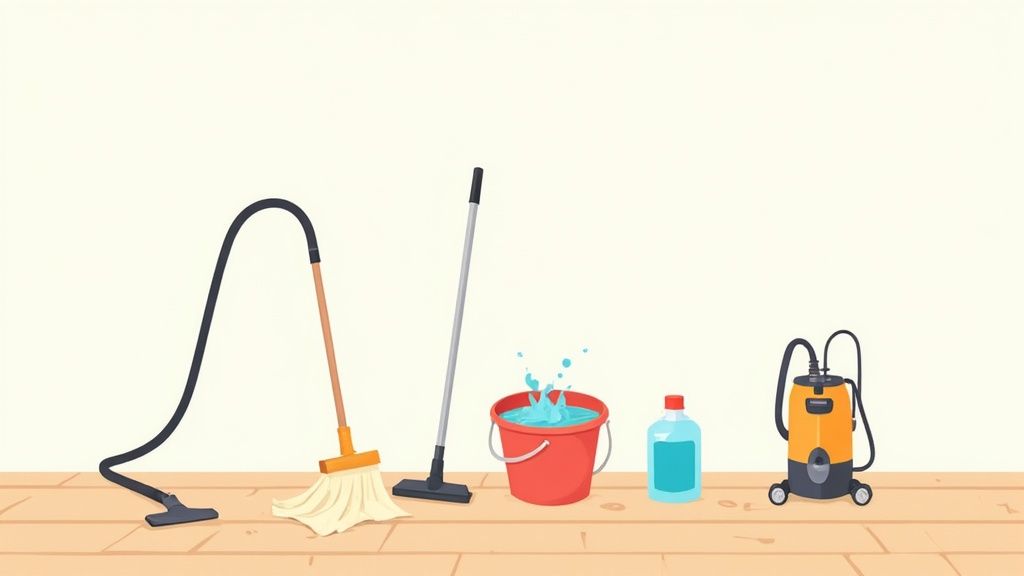
You might not realise it, but using the wrong tools on your wooden floors can cause far more harm than a bit of dirt ever could. That aggressive vacuum cleaner or old-fashioned stiff-bristled broom might feel like they're doing a great job, but they can easily create a network of tiny scratches that, over time, will completely dull your floor's beautiful finish.
Getting your toolkit right is the first, most practical step towards cleaning your wood floors properly. It’s not about buying the most expensive gear on the market, but the right gear – tools that are both effective and gentle on the wood's delicate surface. Let's break down the essential items you'll need.
The Foundation: Dry Cleaning Tools
Before a drop of water touches your floor, you have to get rid of all the dry debris. It's a simple step, but this is where a lot of people make mistakes that can cost them dearly.
Your go-to tool should be a microfibre dust mop. Unlike a traditional broom whose stiff bristles can drag grit across the floor and cause micro-scratches, a microfibre pad uses static electricity to attract and lock in dust, pet hair, and other fine particles. It’s the perfect choice for a quick daily sweep, lifting debris without harming the finish.
For a bit more cleaning power, a vacuum cleaner is a great ally, but only if you use it correctly. The golden rule is to NEVER use a beater bar or rotating brush roll. This feature is designed to agitate carpet fibres and will absolutely batter a wooden floor. Instead, you need a vacuum with a dedicated hard floor head—usually a soft brush attachment—or one where you can switch the beater bar off completely.
Expert Tip: Think of dry cleaning as your floor's first line of defence. Just a quick, five-minute sweep with a microfibre mop in high-traffic spots like the kitchen and hallway can prevent the build-up of abrasive grit that gets ground into the wood.
Mastering the Art of Mopping
When it's time for a deeper clean, your choice of mopping equipment is what separates a gleaming, beautiful floor from a potential disaster. Water is wood's worst enemy, so your tools have to give you total control over moisture.
A flat-head mop with a washable microfibre pad is an excellent starting point. It covers a good amount of ground and makes it easy to manage how much water you're putting down. But if you really want to clean like the professionals, you need to adopt the two-bucket system.
It's a beautifully simple and effective method:
- Bucket One: Holds your diluted, wood-safe cleaning solution.
- Bucket Two: Is filled with clean, fresh water for rinsing.
After you mop a small area, you rinse the dirty mop head in the second bucket, wringing it out thoroughly before dipping it back into your cleaning solution. This tiny change stops you from sloshing dirty water all over your clean floor, giving you a genuinely clean, streak-free result every time. For those looking to master cleaning techniques for all sorts of surfaces, exploring a full range of professional cleaning services can provide fantastic insight.
Finally, always have a small stack of clean, dry microfibre cloths handy. They are absolutely essential for wiping up spills the moment they happen, quickly drying the floor after mopping, and buffing out any last smudges for that perfect, polished finish.
Preparing Floors for a Deep Clean

Before you even think about getting your mop and bucket out, the real success of your deep clean is already being decided. It all comes down to the prep work. This isn't just a box-ticking exercise; it’s the secret to getting that perfect, streak-free finish that looks so good, and more importantly, it keeps your wood safe.
Think of it like this: trying to mop a floor that hasn't been properly swept or vacuumed is like trying to paint over a dusty wall. You aren’t just moving dirt around; you’re grinding tiny particles of grit right into the floor’s surface. This is a surefire way to create micro-scratches and leave your beautiful floor looking dull and lifeless.
Create a Clear Workspace
The first practical step is to get everything off the floor. This isn't just about a quick tidy-up—it's about setting the stage for a proper, thorough job. You need to take a few minutes to move all movable items completely out of the room.
This includes things like:
- Small furniture such as chairs, side tables, and lamps.
- All area rugs and runners.
- Floor-standing plants, decorative baskets, and anything else sitting on the wood.
Clearing the room properly guarantees you can reach every last corner and cranny. It stops you from getting those annoying dusty patches you only notice when a rug is finally moved, ensuring a consistent clean across the entire floor.
One of the most common mistakes we see is when people just clean around the furniture. This doesn't just leave dirty spots; over time, it can lead to uneven wear and even discolouration of the wood's finish.
The All-Important Dust and Debris Removal
With a clear space to work with, your next job is to get rid of every last bit of loose dust and debris. Honestly, this pre-cleaning stage might just be the single most critical part of the whole process. The mission is to remove anything that could act like sandpaper once you introduce a damp mop.
You’ve got two main tools for this: a soft-bristle broom or a vacuum cleaner with the right attachment. If you’re using a broom, be methodical. Use overlapping strokes to guide debris into a dustpan without just flicking it back into the air.
For a more thorough job, though, a vacuum is your best friend. Make sure you use a model that has a hard floor head—this is a soft, brush-like attachment designed specifically for wood. It's absolutely crucial that you switch off the beater bar (the spinning brush meant for carpets), as this can easily damage and scratch your floor.
This isn’t just a quick once-over. Pay special attention to the places where dust and pet hair love to hide:
- Along skirting boards.
- Under radiators.
- In tight corners.
Once you've meticulously removed every speck of grit, your floor is finally ready. It's now a clean slate, allowing your cleaning solution to get to work directly on the grime without the risk of scratching the finish. This is the level of detail we apply to every job, from a family home to a large commercial space. If you want to see how these principles apply on a bigger scale, take a look at our commercial cleaning services. Taking these prep steps seriously is what ensures the final result is a beautifully clean and protected floor.
When you think of mopping, you probably imagine a dripping mop and a flooded floor. For wooden floors, that’s a nightmare scenario. The real trick to cleaning wood floors properly is all about mastering the damp mop—a technique that uses the bare minimum of moisture to get the job done right.
Water is wood's worst enemy. Too much of it can seep between the planks, causing them to swell, warp, and cup. This is particularly a risk in the UK's humid climate. The aim isn't to give your floor a bath; it's to gently lift the dirt that sweeping and vacuuming can't catch.
The Damp Mopping Technique Explained
The whole process starts long before you even put the mop on the floor. First, you need to wring out that mop head like you mean it. It doesn't matter if you have a fancy spin mop or a simple flat-head one; the goal is the same. The mop head should feel just damp, almost dry. If you can wring out a single drop of water, it’s still too wet.
Once your mop is ready, the technique is straightforward but vital:
- Work in small, manageable sections. Don't even think about tackling the whole room in one go. Concentrate on a small area, about one square metre at a time. This keeps you in control and ensures water doesn't sit on the floor for any length of time.
- Mop along the grain. Always move your mop in the same direction as the wood planks. This little trick helps hide any faint streaks and allows the cleaner to get into the tiny crevices of the wood's texture.
- Dry immediately. This is the pro tip that so many people skip. After you've mopped a section, wipe it straight away with a clean, dry microfibre cloth. This lifts any leftover moisture, preventing water spots and protecting the wood's finish.
Never, ever leave standing water on a wood floor, not even for a minute. You might not see the damage right away, but over time, repeated moisture will ruin the finish and the wood itself.
This visual guide shows the thinking behind choosing and preparing your cleaning solution, a crucial step before you start.
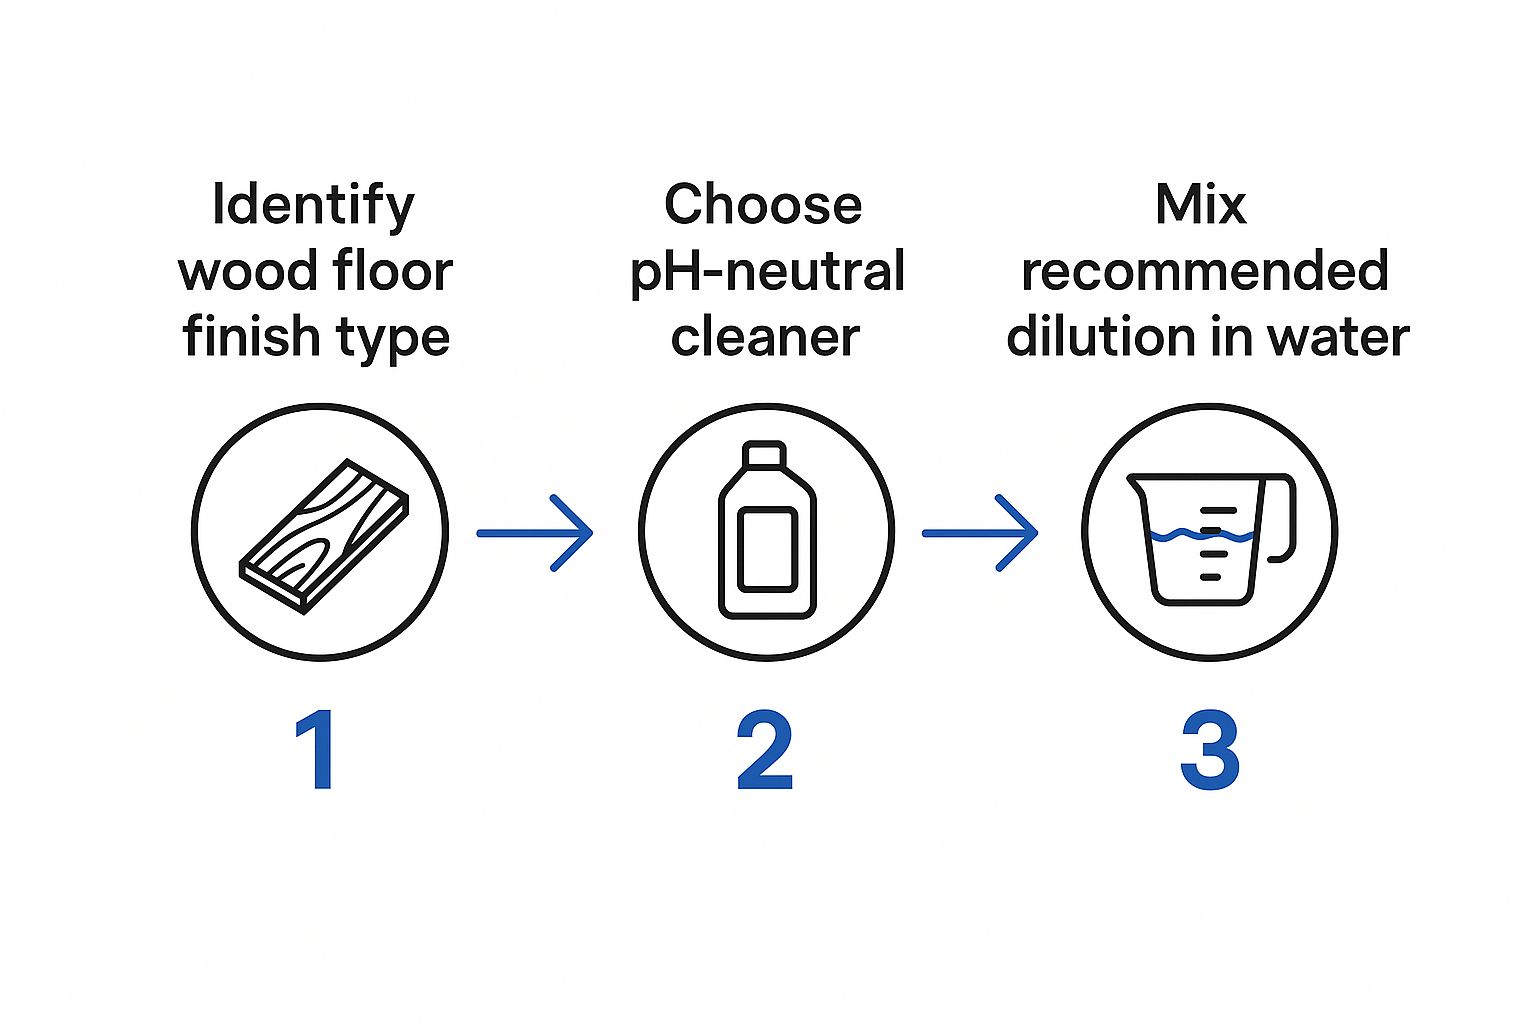
As the infographic shows, the process starts with understanding what your floor needs—from its finish type to using a properly diluted, safe cleaner.
Choosing The Right Mop For The Job
The world of cleaning tools has grown massively, with a huge consumer focus on products that protect our homes. In fact, the global wood cleaner market is expected to reach $2.5 billion by 2025, driven by our demand for safe, effective solutions. You can read more in this wood cleaner market analysis. The mop you choose is a massive part of getting it right.
Here’s a quick rundown of the most popular mops and which ones are best for wood:
- Flat-Head Microfibre Mops: These are usually the top pick for homeowners. Their large, flat surface covers the floor evenly, and the microfibre pads are brilliant at grabbing dirt. You also have fantastic control over moisture since you can easily feel how damp the pad is.
- Spin Mops: A good spin mop with an effective wringing system can be a game-changer. The foot pedal can spin out an incredible amount of water, helping you get that perfect "damp" level with far less effort. Plus, their triangular heads are perfect for getting right into corners.
- Spray Mops: These are great for a quick clean-up, but you have to be careful. Check that the spray function creates a fine mist, not a powerful jet of water. They’re undeniably convenient, but you still need to avoid soaking the floor.
How Often And What To Use
So, how often should you be damp-mopping? For most homes, a deep clean like this is only needed every 1-2 months. Busy areas like kitchens and hallways might need it monthly. Just remember, your daily sweep with a microfibre dust mop is your first and most important line of defence.
When you do mop, always stick to a pH-neutral cleaner made specifically for wood floors. Harsh, all-purpose cleaners can strip the protective finish, leaving your beautiful floor looking dull and exposed to damage. By using the right tools and the right moisture-control technique, you’ll keep your floors looking fantastic for years.
Choosing Safe and Effective Cleaning Solutions
The cleaning solution you pick is every bit as crucial as your mopping technique. It’s a common mistake, but using the wrong product can easily strip your floor’s protective finish, leaving it looking dull and making it vulnerable to all sorts of damage. Walking down the cleaning aisle can feel overwhelming, but the guiding principle is actually quite simple: be gentle.
For most modern wood floors, your safest bet is a pH-neutral cleaner made specifically for wood. These formulas are perfectly balanced to lift grime without being so acidic or alkaline that they damage the finish. Your everyday, all-purpose cleaners are usually far too harsh and can leave behind a sticky residue that dulls the surface over time.
Understanding Your Floor's Finish
Before you even think about buying or mixing a cleaner, you need to know what kind of finish is on your floor. It’s the finish, not the type of wood, that dictates how you should clean it. Most homes in the UK have floors sealed with a surface finish like polyurethane, which is quite resilient. Other finishes, however, need a much more specific approach.
- Polyurethane/Varnish: This is what you'll find on most modern floors. It forms a durable, plastic-like shield over the wood. These floors are the easiest to look after and work well with most commercial pH-neutral wood floor cleaners.
- Hardwax Oil: This type of finish soaks into the wood instead of sitting on top, giving it a lovely natural, matte look. It needs special care, though. You have to use cleaners designed for oiled floors, as standard products can strip the oil away and leave the wood exposed.
- Waxed Floors (Traditional): If you have older, traditionally waxed floors, you should never damp-mop them. Cleaning is a process of buffing and reapplying wax. Getting them wet will only create a cloudy, damaged mess.
Not sure what you have? There's a simple test. Find a hidden spot—inside a cupboard or under a sofa—and place a single drop of water on the floor. If it beads up, your floor is likely sealed. If the water soaks in or leaves a dark spot, you're probably dealing with an oil or wax finish that needs specialised care.
A Simple DIY Cleaner That’s Safe and Effective
If you'd rather mix up your own solution, you can create a gentle and effective cleaner with a couple of things you probably already have. This recipe is perfectly safe for floors with a modern polyurethane finish.
- Start with the Base: Grab a bucket and fill it with one gallon (around 4.5 litres) of warm water.
- Add a Gentle Soap: Add just one or two drops of a mild, pH-neutral washing-up liquid. You really don't need much—just enough to help break down any grease and grime.
- Mix Thoroughly: Give the water a gentle stir to mix the soap in. Try not to create a mountain of foam.
This simple mixture is brilliant for routine cleaning without the risk of harsh chemicals. It gently cleans the surface and is incredibly easy to prepare. Just remember, no matter the floor type, always use a well-wrung-out mop so the surface is dry again within a minute.
The Products You Must Never Use
Some common household cleaners are an absolute disaster for wood floors. Using them can cause damage so severe that only professional sanding and refinishing can fix it.
CRITICAL WARNING: Stay well away from any cleaning solutions that contain ammonia, bleach, or abrasive powders. These are incredibly aggressive and will quickly eat away at your floor's protective layer, causing discolouration and permanent damage.
Vinegar is another popular "DIY" cleaner that you should be very wary of. While a heavily diluted vinegar solution might seem harmless, its acidic nature can slowly degrade a polyurethane finish over time, robbing it of its shine. Protecting delicate materials is always about using the right method. For example, the techniques for professional rug cleaning are highly specialised to avoid damaging fragile fibres—a principle that applies just as much to your wood's finish.
Below is a quick guide to help you choose the right cleaner based on your floor’s finish.
Wood Floor Finish Cleaning Guide
| Finish Type | Recommended Cleaner | What to Avoid | Pro Tip |
|---|---|---|---|
| Polyurethane/Varnish | pH-neutral wood cleaner, mild soap and water solution | Ammonia, bleach, vinegar, abrasive cleaners, steam mops | Test new products in an inconspicuous area first to ensure they don't dull the shine. |
| Hardwax Oil | Manufacturer-recommended cleaner or soap for oiled floors | All-purpose cleaners, acidic solutions (vinegar), excessive water | Regular maintenance with a refresh or maintenance oil will keep the wood nourished and protected. |
| Traditional Wax | Solvent-based liquid or paste wax, buffing | Water-based cleaners of any kind, damp mopping, steam | Cleaning is about buffing and reapplying wax. Never use water, as it will damage the finish. |
Matching your cleaner to your finish is the single most important step in keeping your floors looking their best for years to come.
Long-Term Floor Care and Maintenance
Knowing the right way to clean your wood floors is a great start, but the real secret to keeping them looking beautiful year after year is all about proactive care. Think of it less as a chore and more as a small daily investment that pays off by protecting your floor from the slow, steady wear of everyday life.
It's the simple habits that make the biggest difference. For instance, high-quality doormats at every entrance are absolutely non-negotiable. They are your floor's first line of defence, trapping the abrasive grit, dirt, and moisture that would otherwise get tracked inside and ground into the wood's delicate finish.
Building a Protective Foundation
Another key strategy is to get ahead of potential damage before it even happens. Furniture is often the main culprit behind scratches and gouges, but thankfully, the solution is incredibly simple.
- Apply Furniture Pads: Get some soft felt pads and stick them on the bottom of all your furniture legs. This includes everything from the heavy sofa to the dining chairs that get moved around constantly. It creates a soft, forgiving barrier between the furniture and your floor.
- Check Pads Regularly: Don't just set and forget them. Take a moment to check the pads every few months. They can wear down or pick up grit, so swapping them out for new ones is a small but vital task.
- Handle Spills Immediately: Spills are going to happen, but they don’t have to become stains. The moment liquid hits the floor, wipe it up with a soft, absorbent cloth. If you let it sit, you’re giving moisture time to seep through the finish and potentially into the wood itself.
Your long-term maintenance routine is less about big, time-consuming jobs and more about creating a protective environment for your floors. A few simple, proactive steps can prevent years of damage and save you from costly repairs down the line.
Knowing When to Polish and When to Call a Professional
Over time, even with the best care, the protective top coat on your floor can start to look a little dull from everyday foot traffic. This is where a good polish comes in handy. A quality wood floor polish can bring back that lustrous shine and add a fresh layer of protection. For most homes, this is only needed once or twice a year.
However, some jobs are just too big or complex to tackle on your own. If your floors are suffering from deep scratches, widespread discolouration, or significant wear and tear, it might be time to call in the experts. Professional services have specialised equipment and the kind of knowledge that can make a world of difference. It's a growing trend in the UK, where 17% of private households now employ professional cleaners, showing how much that expertise is valued.
For floors that need more than a simple clean, a professional team can properly assess whether a deep clean, a polish, or a full-scale restoration is required. Understanding your options is key, and our guide on professional wood floor restoration can help you decide on the best course of action to preserve the value and beauty of your flooring.
Common Questions About Cleaning Wood Floors
Getting to grips with how to properly clean wood floors always throws up a few questions. It’s completely normal to feel a bit hesitant—after all, you want to protect your beautiful flooring. To give you a bit more confidence, we've gathered some of the most common queries we hear from UK homeowners and provided clear, practical answers.
One of the biggest uncertainties is how often a deep clean is really necessary. For most homes, a thorough damp mop is only needed every 1-2 months. Your daily or twice-weekly routine of sweeping and vacuuming actually does most of the hard work. However, if you have a busy household with children and pets, or you're tackling a high-traffic spot like a kitchen or hallway, you might find a monthly deep clean keeps everything looking its best.
Can I Use a Steam Mop on Wood Floors?
This is a really common, and very important, question. The short and simple answer is no; we strongly advise against it. Steam mops work by blasting hot, pressurised steam onto a surface. Even on perfectly sealed floors, that intense heat and moisture can find its way into the tiniest gaps between planks or microscopic weak spots in the finish.
Over time, this can lead to serious and often irreversible damage, including:
- Warping and Cupping: The wood planks absorb the excess moisture and begin to swell, causing them to lift and buckle.
- Finish Damage: The high heat can break down the protective polyurethane layer, which leaves the floor looking cloudy, dull, or milky.
- Discolouration: The trapped moisture can cause dark spots or streaks to appear on the wood itself.
While some manufacturers claim their steam mops are safe for sealed hardwood, the risk of long-term damage is simply too high. For the safest and most effective clean, it's always best to stick to a well-wrung-out damp mop.
What Is the Best Way to Fix Scratches?
It's always disheartening to spot a scratch on your lovely floor, but the good news is that many minor marks can be fixed quite easily. The best method really depends on how deep the scratch is.
For very light surface scuffs, you can often just buff them out with a soft, clean cloth. If the scratch has penetrated the finish slightly, a wax repair stick or a blending pencil that matches your floor’s colour can work wonders. These products are designed to fill in the scratch and blend it seamlessly with the surrounding area.
Deeper gouges that have reached the wood itself will need a more robust approach, like a wood filler specifically made for flooring. Once you've filled the scratch and let it dry completely, you'll probably need to sand the area lightly and apply a small touch-up of matching finish to seal it. The golden rule is to always test any repair product on an inconspicuous area first—like inside a cupboard or under a sofa—to make sure the colour and sheen are a perfect match.
At AG Carpet Specialists, we understand all the nuances of wood floor care. If you're dealing with deep scratches, stubborn stains, or general wear that's taken the shine off your floors, our professional team can restore their natural beauty. Contact us today for a free quotation and let us bring your wood floors back to life.



