

Before you even think about picking up a scrubbing brush, it’s vital to get to grips with the unique character of your quarry tile floor. These beautiful, natural clay tiles are famous for being incredibly hard-wearing, but their porous nature is their Achilles' heel. It means they're prone to soaking up years of ingrained dirt and stains.
What to Know Before Cleaning Quarry Tiles
Jumping straight into a deep clean without understanding what you're dealing with is a common mistake. Quarry tiles aren't like your modern, sealed ceramic or porcelain tiles; they are unglazed, natural products loved for their rustic charm and durability. But this very quality is also their biggest weakness. Their surface acts a bit like a sponge, readily absorbing spills, grease, and dirt over many years.
Think about a classic kitchen floor that’s seen decades of family life. The tiles next to the cooker are probably dark with grease, while the ones by the back door might have ground-in garden soil. Trying to clean this with a standard floor mop often just pushes the grime deeper into the tile, making things worse.
Common Quarry Tile Challenges
You’re likely to run into a few specific problems when you start work on an older quarry tile floor. If you can spot them early, you can choose the right cleaning method and avoid accidentally damaging these character-rich surfaces.
One of the most common issues you'll see is efflorescence. This looks like a chalky, white powder or crystalline film on the surface of the tile. It’s caused by soluble salts from within the tile or the screed below being drawn to the surface as moisture evaporates. Crucially, it’s a sign of an underlying moisture problem, not just surface dirt.
Another frequent discovery is built-up layers of old, yellowed polish or wax. Decades ago, waxing was a popular way to give quarry tiles a sheen. Over time, however, this coating traps dirt, darkens, and becomes sticky, creating a grimy film that’s almost impossible to shift with normal cleaning products.
The most important thing is to work out what kind of soiling you’re up against before you start. Is it just surface dirt, a deep-set stain, or a failed old coating? Each one needs a completely different approach.
The Heritage Behind Your Floor
Many of these floors have a rich history, especially in older UK properties. Quarry tiles were a common feature in farmhouse kitchens, churches, and old town halls, chosen for their incredible durability. Often, these stunning original floors have been hidden away for years under carpet or laminate, which can make restoring them even more complex. You can find more details about their history and restoration from tile care specialists.
Understanding this heritage is why a gentle, well-informed approach to quarry tile cleaning is so important. Using harsh, acidic cleaners can permanently etch the surface, while scrubbing too aggressively can wear away the tile's natural, time-worn patina. By getting to know your floor first, you're setting yourself up to revive its original beauty without erasing its history.
How to Prepare Your Floor for a Deep Clean
A fantastic result in quarry tile cleaning always starts with getting the prep work right. Believe me, rushing this initial stage is a fast track to a frustrating afternoon and a finish that just doesn't look its best. The aim here is to create a clean, safe, and totally clear space so your cleaning products can get to work properly.
Your first task is to completely empty the room. This means moving all furniture, rugs, plants, and anything else sitting on the floor. You really need an empty canvas to work on, making sure you can reach every single tile and grout line without having to awkwardly work around things. Don't be tempted to just shuffle items to one side—get them out of the room entirely.
With the room empty, your next job is to protect any vulnerable surfaces from splashes. Your chosen cleaning solution might be brilliant for tiles, but it can easily damage other materials. I always recommend using low-tack painter's tape to carefully mask off your skirting boards, wooden door frames, and the edges of any adjacent flooring like carpet or wood. It's a small step that can save you a lot of hassle later on.
Clear Away Surface Debris
Now it's time to deal with all the loose dirt and dust. This is a non-negotiable part of the process that many people underestimate.
Start with a good, thorough sweep using a soft-bristled brush. This will gather up the larger bits of debris. Make sure to pay close attention to the corners and edges, as that's where dust and grit love to hide.
After sweeping, you absolutely must use a vacuum cleaner. A vacuum will lift all the fine dust and grit that a brush will inevitably miss. Why is this so critical? Any grit left on the floor will act like sandpaper when you begin scrubbing, which can cause fine scratches on the tile surface. It can also contaminate your cleaning solution, turning it into a muddy mess and making the whole job less effective.
Before any liquid touches that floor, it needs to be as free from dust and debris as you can possibly get it. This ensures your cleaning agent attacks the ingrained grime, not just the loose dirt sitting on top.
The All-Important Patch Test
This is, without a doubt, the most crucial step in your preparation. It doesn't matter how confident you are in a cleaning product, you have to test it on a small, out-of-the-way area first.
Quarry tiles are naturally porous and can vary quite a bit, meaning they can react in unexpected ways. A cleaner that works perfectly on one person's floor might cause discolouration or other issues on yours.
Pick a hidden spot for your test—somewhere behind a door, in a corner that will be covered by furniture, or even inside a cupboard if it has the same tiled floor. Follow the full cleaning instructions on this small patch: apply the cleaner, let it dwell for the recommended time, and rinse it off properly. Then, wait for it to dry completely before you check the results.
This simple test confirms two very important things:
- Safety: It makes sure the cleaner won't bleach, stain, or damage your specific tiles in any way.
- Effectiveness: It shows you if the product is actually strong enough to lift the grime, helping you decide if you need a more concentrated mix or a different approach.
Taking just 30 minutes to do this test is your best insurance policy against a full-floor disaster. Once you’re happy with how the test spot looks, you can finally move forward with confidence, knowing you’ve got the right method to bring your beautiful quarry tiles back to life.
A Proven Method for DIY Quarry Tile Cleaning
Now that your floor is prepped, we get to the really satisfying part: the deep clean. This is the moment where you’ll finally lift away years of stubborn grime and see the true, original character of your quarry tiles shine through. We're going far beyond a simple mop and bucket here.
The key is to use a powerful alkaline-based cleaner. From my experience, nothing beats it for breaking down the tough, ingrained grease, old waxes, and general muck that gets trapped in the porous surface of quarry tiles.
An alkaline solution essentially works by emulsifying oils and fats, loosening their grip on the tile. Think of it as a heavy-duty degreaser made specifically for your floor. You can find fantastic, ready-made products for this, often sold as heavy-duty tile and grout cleaners.
Getting The Mix Right and Laying It Down
The first step to a great result is mixing your alkaline cleaner correctly. Always, and I mean always, follow the manufacturer's instructions on the bottle. The ideal dilution ratio really depends on how dirty your floor is. For general dirt, a weaker mix of around 1 part cleaner to 10 parts water usually does the trick. But for those really tough, greasy patches, especially in a kitchen, you might need a stronger solution, perhaps 1 part cleaner to 3 parts water.
A quick tip: always add the cleaner to your bucket of warm water, not the other way around. This little trick stops it from foaming up too much.
Once mixed, be generous when you apply it. Use a mop or a large sponge to wet a small, manageable section of the floor. Don’t try and flood the entire room at once.
The golden rule is to work in small, manageable sections—no bigger than a square metre at a time. This is critical because it stops the cleaning solution from drying out before it’s had a chance to work its magic.
Letting It Dwell and Getting Stuck In
After applying the solution, you need to be patient. This "dwell time" is absolutely crucial for success. Let the cleaner sit on the tiles for about 10-15 minutes. You’ll actually see it start to work, loosening the dirt and creating a murky slurry on the surface.
Once the time is up, it’s time for a bit of elbow grease. Grab a stiff-bristled, long-handled brush and give the area a good, firm scrub. Make sure you work in different directions—go side-to-side, then up-and-down. This helps the bristles get right into the pores of the tile and, most importantly, into those grout lines. For really stubborn grout, a small, handheld grout brush will be your best friend.
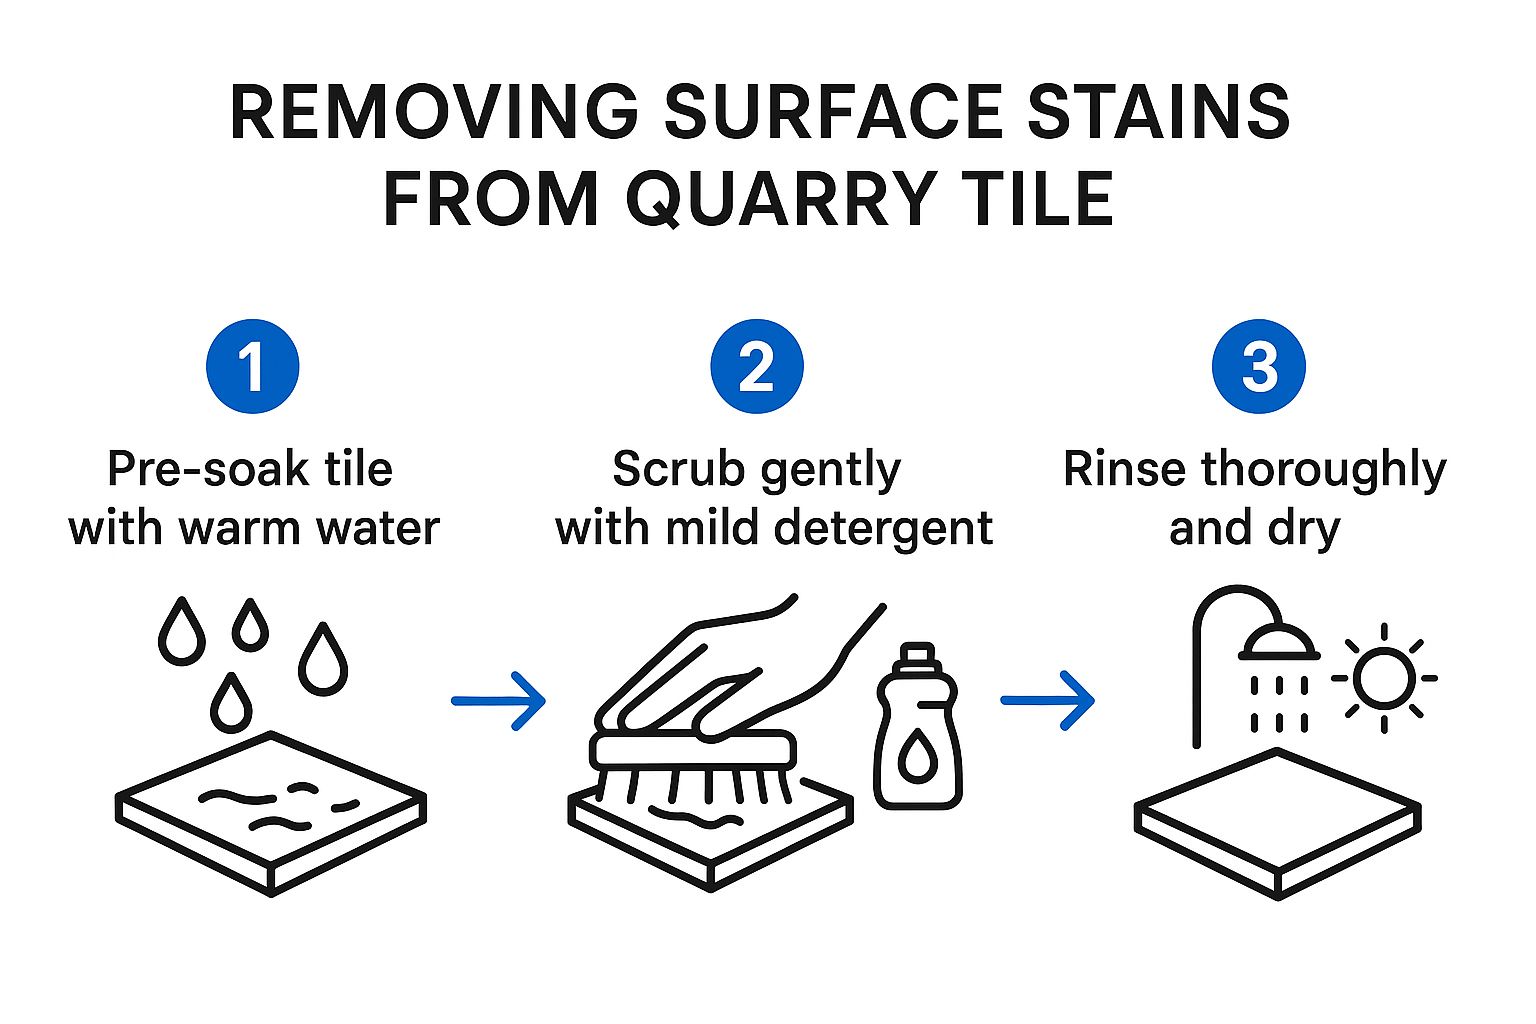
As this image shows, even a basic clean follows a clear, methodical process. You can't just skip steps and expect a good outcome.
Choosing The Right Cleaner for Your Floor
Not all floors need the same level of intervention. To help you pick the right approach, here's a quick comparison of common cleaning agents you might consider.
Comparing DIY Quarry Tile Cleaning Solutions
| Cleaning Agent | Best For | Pros | Cons / Cautions |
|---|---|---|---|
| pH-Neutral Cleaner | Regular, light maintenance and recently sealed floors. | Gentle on tiles and sealer; safe for frequent use. | Won't remove deep, set-in grease or heavy soiling. |
| Alkaline Cleaner | Breaking down heavy grease, oils, and old waxes. | Extremely effective for deep cleaning neglected floors. | Can strip old sealers; requires thorough rinsing; gloves needed. |
| Vinegar & Water (Mild Acid) | Haze from grout, light mineral deposits. | Cheap and readily available. | Can damage grout and etch the tile surface if used too strong or too often. Use with extreme caution. |
| Steam Cleaner | Sanitising and lifting surface dirt without chemicals. | Eco-friendly; great for killing germs and allergens. | May not be powerful enough for very heavy grease; can damage wax finishes. |
While vinegar is often touted as a do-it-all cleaner, I'd urge caution with quarry tiles. The acidic nature can do more harm than good over time. For a true deep clean, an alkaline solution is almost always the superior and safer choice for the tile itself.
Lifting The Grime and Rinsing It All Away
After a good scrub, you’ll have a dirty, liquid slurry on the floor. The next step is to remove it properly. Don’t just push it around with a dirty mop. The absolute best way is to use a wet-and-dry vacuum cleaner to suck up all the dirty liquid. This physically lifts the grime completely off the floor, preventing it from settling back into the grout lines as it dries.
If you don’t own a wet-and-dry vac, don't worry. You can achieve the same result with old towels or a sponge and a separate bucket of clean water. It’s more work, but just as effective if you’re thorough. This principle of extraction is vital in many types of floor care, a concept we touch on in our professional rug cleaning guide as well.
Once a section is clear, move on to the next, making sure to overlap slightly with the clean area for a perfectly even finish.
After the entire floor has been cleaned, the final step is a thorough rinse. Go over the whole area with a clean mop and fresh water to remove any lingering traces of the cleaning solution. This is a vital step you can't afford to skip, especially if you're planning to seal the tiles afterwards.
Sealing and Protecting Your Restored Tiles
After putting in all that effort, your quarry tiles are finally looking their best, free from years of built-up dirt and grime. It’s a great feeling, but the job isn’t quite finished. Leaving them as they are now would be a huge mistake. Sealing is the crucial final step in any quarry tile cleaning project, and skipping it will undo all your hard work.
Quarry tiles are naturally porous, meaning they absorb spills and dirt like a sponge. An unsealed floor will quickly pick up new stains, putting you right back where you started. A quality sealant works by creating a protective shield just below the surface, repelling water, oil, and everyday grime, which makes future cleaning a breeze.
Choosing Your Sealer Finish
Your first decision is about the final look you want to achieve. This is mostly down to personal taste and the style of your home. Sealers for quarry tiles generally fall into two main categories, each giving a very different appearance.
Here’s a quick guide to help you choose:
- Impregnating or Penetrating Sealers: These soak right into the tile, forming an invisible barrier. If you love the completely natural, rustic character of your floor, this is the one for you. The finish is usually matte and won’t really change the tile’s colour.
- Topical or Surface Sealers: These create a film over the top of the tile. They can add anything from a subtle sheen to a high gloss, which tends to deepen and enrich the tile’s natural colour. They provide excellent protection but can show wear and tear more obviously in busy areas over time.
For most traditional UK homes, an impregnating sealer with a matte finish is the go-to choice because it keeps that authentic, historic feel of the floor intact.
Think of sealing as an investment in your floor's future. The right product doesn't just make daily upkeep easier; it's your first line of defence against everyday mishaps like a spilt glass of red wine or a splash of olive oil.
Applying the Sealant for a Perfect Finish
Applying the sealant itself is straightforward, but you need to be patient and precise. First things first: the floor must be 100% clean and bone dry. Any moisture trapped underneath will create a cloudy look or stop the sealant from curing properly. It’s best to wait at least 24-48 hours after the final rinse for the tiles to dry out completely.
- Get Some Air Flowing: Open up all the windows and doors in the room. Even modern sealers can have a strong smell, so good ventilation is essential for safety and helps the sealant dry.
- Apply It Evenly: Grab a clean, lint-free cloth or a foam applicator. Pour a small amount of sealer onto the cloth, not straight onto the floor. Work in small, manageable sections, applying the product in thin, even strokes.
- Wipe Away Any Excess: Let it soak in for about 5-10 minutes, then go back over the area with a new, dry cloth to buff off any sealant that hasn't been absorbed. This simple step is what stops the floor from ending up with a sticky, tacky finish.
- Add Another Coat (Or Two): Most quarry tile floors will need at least two coats to be properly protected. Just make sure you follow the manufacturer's instructions for drying times between coats, which is typically a few hours.
This process is a core principle for protecting all kinds of natural flooring. If you’re dealing with other types of floors, our detailed guide to professional stone cleaning covers similar techniques for different materials.
Once you’re done, the sealant needs to cure fully. That means keeping everyone off the floor for at least 24 hours. After that, your beautifully restored and protected quarry tile floor is finally ready to be enjoyed for many years to come.
Long-Term Quarry Tile Maintenance and Care
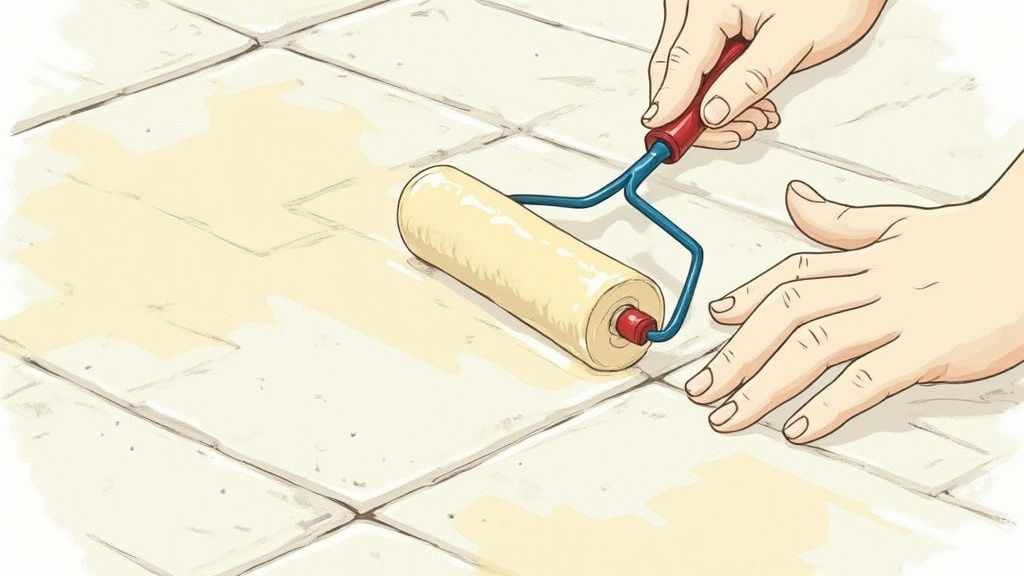
Now that you’ve put in the hard work to restore and seal your quarry tiles, the goal is to keep them looking that good. Long-term care isn’t about more gruelling deep cleans; it’s about putting smart, simple habits in place to stop dirt from building up and ruining your finish.
The biggest shift you'll make is to your weekly cleaning routine. It's time to get rid of those harsh, all-purpose floor cleaners. Their acidic or highly alkaline formulas can actually eat away at the sealant you just applied, undoing all your effort. From now on, a pH-neutral cleaner is your floor's best friend. These gentle formulas clean the surface perfectly without damaging that protective seal. A quick mop once a week with a pH-neutral product and warm water is all you'll need.
This focus on specialised care is part of a bigger picture. The UK cleaning industry, valued at around £59.8 billion in 2021, is growing as more people understand the importance of proper maintenance. With 40% of younger people now hiring cleaning help due to lifestyle shifts, there’s a greater awareness of using the right techniques. You can read more about these insights into the UK cleaning industry and its evolution.
Smart Habits for Daily Protection
On top of your weekly mop, a few small daily habits can make a huge difference in protecting your floors. Think of them as your first line of defence.
- Doormats are Essential: A good quality doormat at every entrance is a must. They trap the grit, dirt, and moisture from shoes before it even gets a chance to scratch and dull your beautiful tile finish.
- Tackle Spills Immediately: One of the best things about a sealed floor is that spills tend to bead up on the surface instead of soaking in. When accidents happen, just blot them up quickly with a cloth. This stops the liquid from sitting too long and potentially finding a way through the sealant to cause a stain.
The secret to great maintenance is all about prevention. A little bit of gentle, regular care is far easier and more effective than letting the grime build up for another deep clean down the line.
Knowing When to Refresh Your Sealant
No sealant lasts forever, particularly in high-traffic spots like hallways, kitchens, and utility rooms. The key is knowing when it's time to apply a fresh coat to keep that protection strong.
There’s an easy way to check. Just put a few drops of water on a tile in a busy area of the room. If the water beads up into tight little droplets, your sealant is still in great shape. But, if you notice the water starting to spread out and soak into the tile, making it look darker, that’s your signal. It means the protective barrier is wearing thin and it’s time for a top-up coat.
Staying on top of this is much simpler than doing a full strip and reseal again. These same principles of proactive care apply to other furnishings in your home, which is a philosophy we apply to our professional upholstery cleaning services.
Of course. Here is the rewritten section, crafted to sound completely human-written and natural, following all the specific style and formatting requirements.
When to Call a Professional Tile Cleaner
While getting stuck in with a bit of DIY cleaning can work wonders for day-to-day grime on quarry tiles, there are times when it’s best to call in the experts. Knowing when to put down the scrubbing brush and pick up the phone can save you a lot of hassle and prevent accidental, costly damage—especially if you're dealing with beautiful, older floors full of character.
Some situations just demand a professional touch. If your floor has layers of stubborn old sealant or varnish that just won’t budge with the products you can buy off the shelf, a pro has access to much stronger stripping agents and, crucially, knows how to use them safely. Likewise, if you’re seeing widespread efflorescence—that chalky white stuff—it can signal a deeper moisture problem coming up from beneath the floor. A professional can help figure out the root cause, which is the only way to stop it from coming back.
Challenges Best Left to Professionals
Certain problems need specialised equipment you simply can't hire from your local shop. Think of deeply scratched or chipped tiles that need careful repair and colour-matching, or floors with severe oil stains that have soaked deep into the porous clay.
Here are a few clear signs it’s time to bring in the professionals:
- Stubborn Old Coatings: You’ve given it a good go with an alkaline cleaner, but that thick, yellowed layer of old wax or acrylic sealant is firmly stuck.
- Widespread or Recurring Efflorescence: This often points to damp issues that need an expert diagnosis, not just a surface clean.
- Significant Physical Damage: Deep scratches, cracks, or loose tiles need a specialist’s touch to repair them so they blend in perfectly.
- Extensive or Complex Projects: Large areas in commercial buildings or delicate, historic tiles in heritage properties really need professional care. For these bigger jobs, it's worth looking into dedicated commercial cleaning services.
A professional tile cleaner doesn't just turn up with powerful machines; they bring years of experience. They can correctly identify the tile, figure out what the soiling is, and pick the exact method to restore it without causing any harm.
The popularity of durable, natural materials like quarry tiles isn’t going anywhere, especially with the growing focus on sustainable building. You can read more about the UK's ceramic tile industry growth and what's driving the market. Investing in professional care ensures these valuable floors are looked after properly, protecting their integrity and value for many years to come.
Got Questions About Quarry Tile Care?
Even with the best plan, you're bound to run into a few head-scratchers when looking after quarry tiles. It's completely normal. Let's walk through some of the most common issues people face so you can handle your floors like a seasoned pro.
A question that comes up time and time again is about using steam cleaners. My advice? Steer clear. The intense, high-pressure heat from a steamer can easily weaken or even strip away the sealant you’ve carefully applied. If your tiles are unsealed, that steam can force moisture deep into the porous clay body, which often leads to those chalky white stains appearing later on.
Tackling Common Problems
What about those white, powdery marks? If you see this, you’re almost certainly dealing with efflorescence. It’s just mineral salts migrating to the surface as moisture evaporates out of the tile.
Your first move should be to grab a stiff, dry brush and see if you can simply brush it away. If the stains are being stubborn, an efflorescence remover is your next port of call, but always—and I mean always—test it on an inconspicuous area first.
To prevent it from returning, you’ll need to play detective and figure out where the damp is coming from before you even think about resealing.
The only real long-term fix for efflorescence is to solve the underlying moisture problem. Cleaning the surface is just a temporary patch.
Another big question is how often you should be resealing your floor. Honestly, it all comes down to how much use the area gets. A high-traffic kitchen or hallway might need its sealant re-applied every 2-4 years.
There’s a really simple way to check. Drip a little water onto a tile. If it beads up neatly on the surface, your sealant is holding up perfectly. If the water soaks in and darkens the tile, that’s your cue—it’s time for a fresh coat.
Of course, some flooring jobs are more complex. For those bigger challenges, you can always explore the range of our professional cleaning services for expert help.
At AG Carpet Specialists, we have the expertise and professional tools to restore all types of flooring, from historic tiles to modern carpets. Contact us today for a free quotation and let us bring your floors back to their best.



