
Look, daily sweeping is a great habit, but it barely scratches the surface. For a truly clean floor, you need to go deeper. A deep clean of hardwood floors isn’t just about getting rid of dust; it’s about tackling the stubborn, embedded grime and oily residues that build up over time, dulling your floor's natural shine and even damaging the finish.
Why Daily Sweeping Isn’t Enough
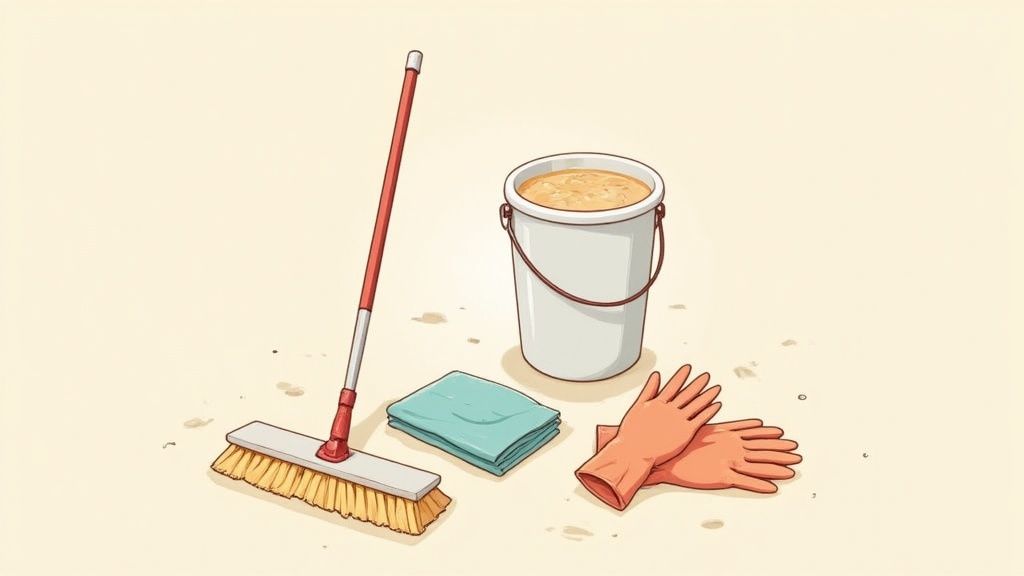
Let’s be honest—your daily sweep or quick vacuum is just basic maintenance. It’s perfect for grabbing dust bunnies and crumbs, but it leaves behind a more persistent layer of dirt. Think of it as the difference between a quick wipe of your kitchen counter versus giving it a proper, satisfying scrub.
Over time, this invisible build-up creates a hazy, lacklustre film on your beautiful wood floors. This layer is usually a combination of a few things:
- Oily Residues: Think cooking grease from the kitchen, oils from bare feet, and even pet dander. These all contribute to a sticky film that just attracts more dirt.
- Cleaning Product Buildup: Using the wrong cleaners, or even just too much of the right one, can leave a dulling residue that simple mopping just can't shift.
- Embedded Grime: Fine particles of dust and dirt get ground into the wood's grain and the tiny micro-scratches in the finish. This is especially true in high-traffic spots like hallways and kitchens.
This accumulation doesn't just look bad; it can slowly wear away your floor's protective finish, making it far more vulnerable to scratches and water damage down the line.
The True Goal of a Deep Clean
A proper deep clean is all about restoration. The aim is to carefully strip away months, or even years, of built-up grime, revealing the wood's original lustre and colour underneath. It’s not about harsh, aggressive scrubbing but using the right techniques to lift dirt without harming the floor itself. While some methods might seem effective, you need to understand the risks before, for example, you steam clean wooden floors, as too much moisture can cause serious damage.
The real value of deep cleaning is preservation. By removing the abrasive particles and chemical buildup that your daily routine misses, you are actively extending the life of your floor’s finish and preventing the need for costly refinishing down the line.
It's no surprise that more people are turning to specialists for this kind of work. The UK cleaning industry's revenue hit around £59.8 billion back in 2021, and there's been a clear cultural shift, with 40% of people under 35 now hiring professional cleaners for more intensive jobs. This just goes to show a wider appreciation for the kind of thorough care that preserves valuable parts of a home, like hardwood floors. A periodic deep clean really is one of the best investments you can make.
Gathering Your Tools and Prepping the Space
Before a single drop of cleaner even touches your floor, proper preparation is the real secret to getting that professional-level finish. From my experience, a successful deep clean is about 90% prep and 10% execution. If you rush this first part, you risk ending up with scratched floors, damaged furniture, or a streaky finish that just leaves you feeling disappointed.
Think of it like painting a room—you wouldn't dream of starting without putting down dust sheets and masking off the edges. The very same logic applies here. Taking a few moments to gather the right kit and clear the space is what ensures your deep cleaning of hardwood floors goes off without a hitch.
The right equipment really does make all the difference. As hardwood flooring has become more popular across the UK, the market for specialised cleaning tools has grown with it. In fact, research shows that the UK floor cleaning equipment market was valued at around £320 million back in 2018 and is on track to hit nearly £600 million by 2025. This tells us that homeowners are wisely investing in tools that protect the quality of their wood. You can find more on this in market analyses from places like Grand View Research.
Essential Toolkit for Deep Cleaning Hardwood Floors
To do the job right, you don't need a massive collection of supplies, just the correct ones. The key is to use tools that are gentle on your wood's finish but still tough on grime. Here is a simple table outlining what you'll need.
| Tool Category | Essential Items | Why It's Needed |
|---|---|---|
| Dry Cleaning | Vacuum with a soft brush head | A standard beater bar can create tiny scratches. A hardwood setting or soft attachment is a must. |
| Wet Cleaning | Two buckets | One for the cleaning solution, one for clean rinse water. Prevents spreading grime back onto the floor. |
| Mopping | Microfibre mop (with 2-3 heads) | Microfibre is brilliant at trapping dirt without being abrasive. A spray mop with washable pads also works well. |
| Cleaning Agent | pH-neutral wood floor cleaner | Harsh chemicals or acidic solutions like vinegar can dull the finish over time. Always use a dedicated wood cleaner. |
| Drying | Soft cloths or old towels | Absolutely essential for drying the floor immediately after rinsing to prevent water damage. |
This focused toolkit has everything you need to clean your hardwood floors effectively without causing any harm.
Clearing and Protecting the Room
Once your tools are ready, it’s time to get the room itself prepped.
Start by moving all furniture, rugs, and any other items completely off the floor. If you have a piece of furniture that’s too heavy to move out of the room, slide some furniture pads or even a couple of old, folded towels under its legs. This will protect both the furniture and your floor while you work.
Next, give the entire floor a really thorough vacuum or sweep. Your goal here is to get rid of every last bit of loose dust, pet hair, and general debris. Trying to mop a gritty floor is like rubbing it with fine sandpaper—it’s a surefire way to create micro-scratches. Pay close attention to corners and along the skirting boards, as that’s where dust loves to hide.
This initial dry clean is crucial because it ensures the wet cleaning phase is as effective as possible.
Pro Tip: Never, ever leave standing water on your hardwood floor. The aim is damp mopping, not wet mopping. Excess moisture is wood's absolute worst enemy and can lead to warping, staining, or even more serious damage over time.
The Deep Cleaning Method That Actually Works
Right, this is where we get down to business. Let's forget those overly complicated guides for a moment. What you need is a straightforward, effective method for a proper deep clean of your hardwood floors. The real secret is to work in small, manageable sections, making sure you clean thoroughly without ever letting water sit for too long.
Think of it this way: you’re lifting away a stubborn layer of grime, not flooding the floor. By working methodically in one small area at a time—say, a 1-metre by 1-metre square—you stay in complete control. This targeted approach stops streaks in their tracks and guarantees every inch of your floor gets the attention it deserves.
The Two-Bucket System for a Flawless Finish
One of the biggest mistakes I see people make is using a single bucket. After the first few passes, you're essentially just mopping with dirty water. The two-bucket method is an absolute game-changer and, in my book, it's non-negotiable for a true deep clean.
Here’s the simple setup:
- Bucket One (Solution): This has your chosen pH-neutral hardwood floor cleaner, diluted exactly as the manufacturer recommends.
- Bucket Two (Rinse): This is just clean, warm water. Its only job is to rinse your dirty mop head.
The process couldn't be easier. Dip your clean microfibre mop into the cleaning solution, wring it out until it’s just damp, and clean your first section. Before that mop goes anywhere near the cleaning solution again, you rinse it thoroughly in the rinse water bucket and wring it out completely. This simple step is what stops you from contaminating your cleaning solution and just spreading dirt back onto the floor.
This separation of clean and dirty water is the secret to a streak-free finish. It ensures that only clean solution touches your floor, lifting dirt away rather than just moving it around.
Applying the Cleaner and Scrubbing Effectively
When you’re ready to start, dip your mop into the cleaning solution and wring it out properly. The mop head should feel damp, not dripping wet. Begin mopping your first small section, always moving with the grain of the wood. This little trick helps the cleaner get into the natural lines of the floorboards, lifting out that embedded dirt far more effectively.
For any stubborn, sticky spots or visible grime, you might need a bit more elbow grease. But don't be tempted to just push down harder with the mop. Instead, grab a soft-bristle brush (an old toothbrush is perfect for tight spots) and gently scrub the area with a tiny amount of your cleaning solution. Always scrub in the direction of the wood grain to avoid causing any micro-scratches.
The image below gives you a good idea of the proper motion for scrubbing and applying cleaner.
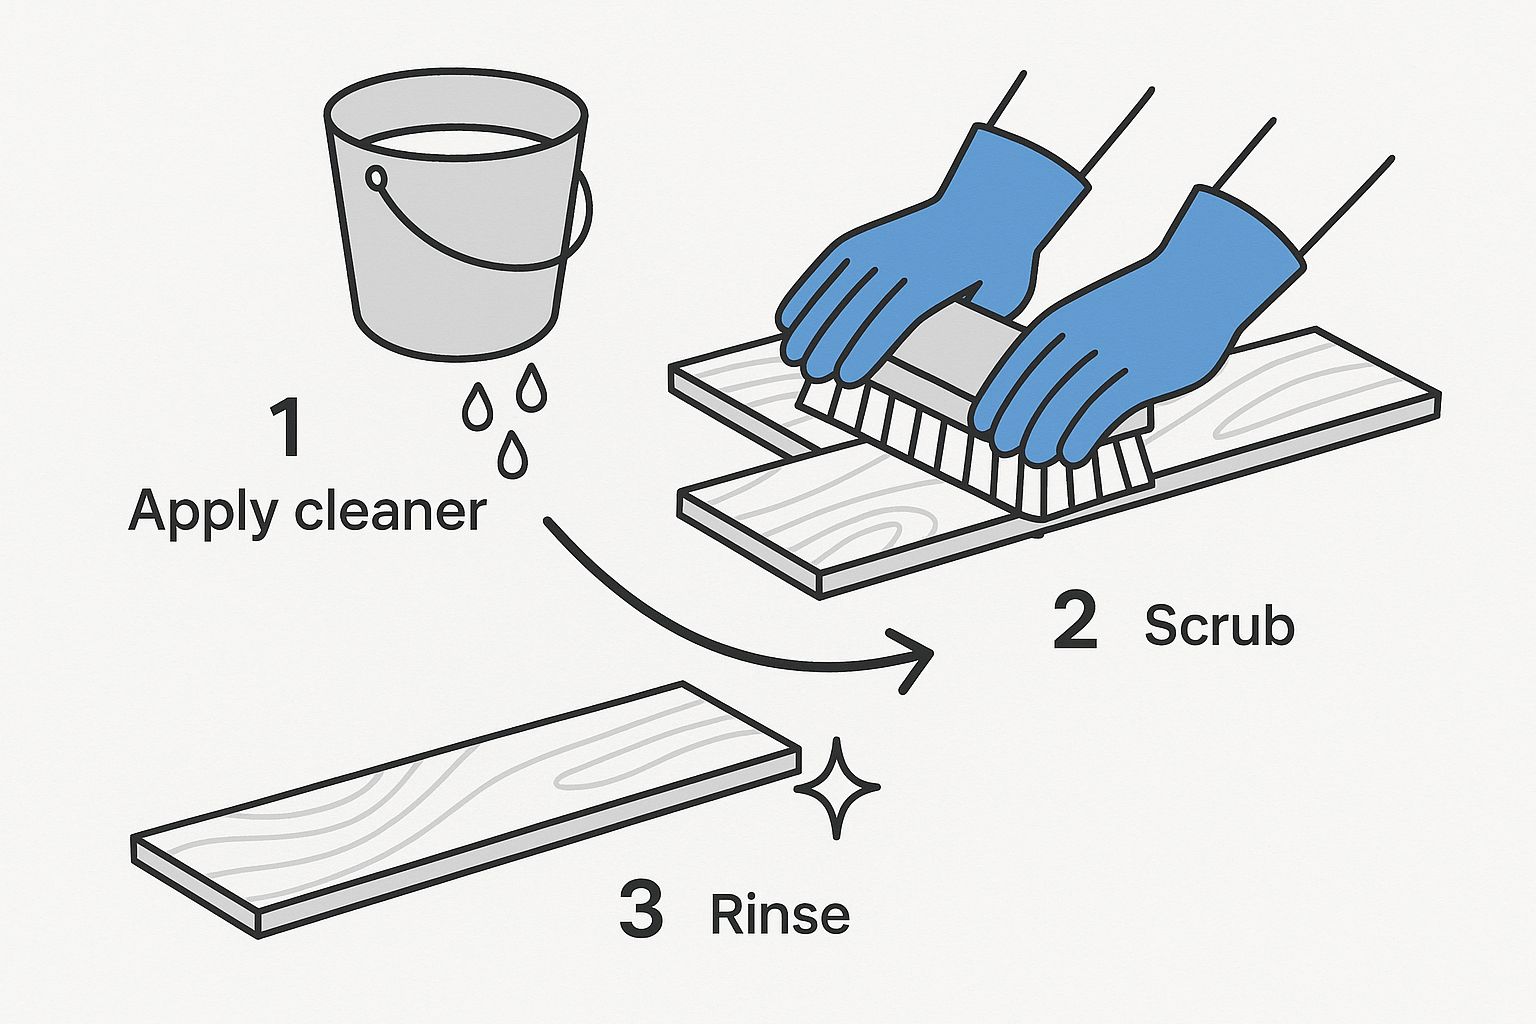
This visual shows how working with the grain and using gentle tools is crucial for a deep clean that also protects your floor's finish.
The Crucial Rinse and Dry Stage
After cleaning a section, it's time to rinse. Swap to a clean microfibre mop head, dip it into your clean rinse water, and wring it out thoroughly. Go back over the section you just cleaned to lift away any lingering residue from the cleaning solution. This step is absolutely vital for preventing that dull, hazy film from forming as the floor dries.
Immediately after rinsing, dry the area completely with a soft, dry cloth or towel. Never, ever let water air-dry on a hardwood floor. Once that first section is clean, rinsed, and perfectly dry, you can move on to the next one, slightly overlapping with the previous area to keep the results consistent.
This methodical process is also the foundation for more advanced treatments. You can explore more about hardwood floor cleaning and polishing to see how a great deep clean sets the stage for a lasting shine.
DIY or Call in the Pros? Making the Right Choice
It’s a question every homeowner faces when a big job like deep cleaning hardwood floors comes around: should you tackle it yourself or bring in the professionals? There’s no single right answer. It really boils down to your budget, how much time you have, and your comfort level with the task at hand. Making a smart decision now can save you a world of hassle—and potentially a lot of money—down the road.
The DIY route certainly has its appeal. There’s a real sense of accomplishment in seeing your floors gleam from your own hard work, not to mention the immediate cost savings. You work on your own schedule and take all the credit for the sparkling result.
However, this path isn't for the faint of heart. One wrong move—using the wrong cleaning solution, a tool that's too abrasive, or even just a bit too much water—can lead to permanent damage. We’re talking about everything from a dulled, lifeless finish to warped and cupped floorboards. For instance, many people ask about using steam. It seems like a good idea, but you can learn about the specific risks in our detailed guide on steam cleaning wooden floors.
When to Call the Professionals
Hiring a professional service brings a level of expertise and specialised equipment right to your door. A trained technician knows the difference between various wood types and finishes, ensuring they use the right products and techniques every time. This is especially crucial if your floors are delicate, antique, or engineered hardwood, which all require a very specific touch.
Here are a few scenarios where getting the professionals in is almost always the better call:
- Getting your home ready to sell: A flawless, professionally cleaned floor can seriously boost your property's value and appeal to buyers.
- End-of-tenancy cleaning: Many rental agreements now require a professional clean to guarantee you get your deposit back.
- Tackling stubborn damage: If your floors are plagued by deep-set stains, heavy scuffing, or a dullness that just won’t shift, professional-grade machinery can often restore them in a way DIY methods simply can't.
The UK's cleaning industry is huge, with over 66,500 companies operating across the country. A large number of these businesses specialise in services like end-of-tenancy cleans, where hardwood floor care is a top priority. The depth of expertise is immense, particularly in places like London and the South East where demand is highest. You can find more facts about the UK cleaning industry and its economic impact.
To help you weigh your options, let’s break down the key differences between going it alone and hiring an expert.
DIY vs. Professional Hardwood Floor Deep Cleaning
| Factor | DIY Approach | Professional Service |
|---|---|---|
| Cost | Lower upfront cost (materials only) | Higher initial investment |
| Time | Can be very time-consuming | Fast and efficient |
| Equipment | Limited to consumer-grade tools | Access to industrial-grade machinery |
| Expertise | Relies on your own research and skill | Years of hands-on experience and training |
| Risk of Damage | High, if incorrect methods are used | Very low, plus they are insured |
| Results | Good for light maintenance | Superior deep clean and restoration |
Ultimately, choosing a professional is about more than just convenience.
Choosing a professional isn't just about paying for a service; it's an investment in peace of mind. You're entrusting your floors to experts who carry insurance and guarantee their work, protecting you from costly mistakes.
So, what's the final verdict? If you're confident in your skills, have done your homework, and are just giving your floors a routine refresh, DIY can be a fantastic and rewarding option. But for those high-stakes situations or for floors that need some serious TLC, calling in a professional ensures the job is done right, the first time.
Keeping Your Floors Brilliant After the Deep Clean
You've put in the effort to deep clean your hardwood floors, and the last thing you want is for that brilliant shine to disappear in a few weeks. The secret to preserving your hard work isn't about more intense cleaning; it's all about smart, consistent maintenance. A simple routine can make a massive difference, extending the time between deep cleans and keeping your home looking its best.
Think of it as your long-term strategy for floor care. It's a system built on small, regular actions that prevent the kind of grime build-up that forced you to do a deep clean in the first place.
Your Weekly and Monthly Maintenance Plan
The best routine is one you can actually stick to. You don’t need to spend hours every day—just a few targeted tasks each week will make all the difference.
-
Weekly Sweep and Damp Mop: At least once a week, give your floors a good sweep or vacuum with a soft-bristle head to get rid of dust and grit. Follow this with a damp mop using a pH-neutral cleaner made specifically for wood. And remember, the mop should be damp, never soaking wet.
-
Monthly High-Traffic Check: Once a month, focus on the high-traffic areas like hallways, entrances, and the floor around your kitchen. These spots often need a bit more attention to stop dirt from getting ground in.
For a more detailed breakdown, our guide on how to maintain hardwood floors provides an excellent long-term care schedule.
Essential Preventative Measures
Honestly, the easiest way to keep floors clean is to stop dirt from ever getting inside. Simple preventative steps are often far more effective than any cleaning product you can buy.
The best offence is a good defence. Placing high-quality doormats at every entrance can trap an estimated 80% of dirt and debris before it ever touches your hardwood, significantly reducing wear and tear over time.
Another absolute must for protecting your floors is to put felt pads on the bottom of all furniture legs. For things that get moved around a lot, like dining chairs, I’d recommend using nail-in felt pads. They’re much more durable than the stick-on ones and won't fall off after a few months. This tiny step is your best defence against the scratches and scuffs that dull a floor's finish.
Finally, always wipe up spills the second they happen. Liquid is the number one enemy of wood, and acting fast prevents staining and potential water damage. By combining these simple habits, you’ll keep that just-cleaned lustre shining for much, much longer.
Your Top Hardwood Deep Cleaning Questions Answered
Even with the best guide in hand, it’s natural to have a few lingering questions. When you’re dealing with something as important as your home’s hardwood floors, you want to be completely sure you’re doing the right thing.
We get it. After years in the field, we’ve heard just about every question there is. To give you that extra bit of confidence, we’ve put together answers to the most common queries we receive from homeowners just like you.
How Often Should I Be Deep Cleaning My Hardwood Floors?
This is easily the most frequent question we get, and the honest answer is, it really depends on your home. There’s no single, one-size-fits-all schedule. The right frequency comes down to your lifestyle – how much foot traffic your floors see, and whether you have kids or pets.
For an average family home, a deep clean every 6 to 12 months is a solid rule of thumb. But instead of just circling a date on the calendar, it’s far better to learn the signs that your floors are asking for a bit of extra care.
Keep an eye out for these tell-tale signs:
- A stubborn haze or dull film that your regular weekly clean just won’t shift.
- Areas that feel slightly sticky or tacky underfoot, especially in busy spots like the kitchen or entryway.
- Visible grime that’s worked its way into the wood grain or collects along the edges of the planks.
Once you spot these issues, you know a simple surface mop isn't going to cut it anymore.
Is It Safe to Use a Steam Mop on Hardwood?
We have to be very clear on this one: we strongly advise against ever using a steam mop on hardwood floors. It might seem like a great way to sanitise your floors, but the potential for damage is just too high.
Steam mops work by blasting hot, high-pressure moisture into a surface. For a natural material like wood, this is a recipe for disaster. That intense moisture can easily bypass the floor’s protective finish, causing the wooden planks to warp, cup, or swell.
Worse yet, using a steam mop will likely void your flooring manufacturer's warranty. This leaves you with no support if something goes wrong.
While some steam mop brands claim they are safe for sealed hardwood, flooring professionals and major bodies like the National Wood Flooring Association consistently recommend against them. The risk of permanent damage far outweighs any temporary cleaning benefit.
What's the Difference Between Polishing and Deep Cleaning?
It's a common point of confusion, but deep cleaning and polishing are two very different jobs in your floor care routine. Knowing the distinction is key to getting the look you want.
Deep cleaning is all about removal. Its one and only job is to strip away the built-up dirt, grime, product residue, and oils from the surface of your floor. Think of it as hitting the reset button, getting your floors back to a truly clean slate.
Polishing, on the other hand, is all about addition. A floor polish is a product you apply to fill in tiny, microscopic scratches in the finish. It helps to even out the sheen and adds a thin, fresh layer of protection against everyday wear and tear.
The golden rule is you must always deep clean before you polish. If you apply polish over a dirty floor, you’re just sealing all that grime in, which will make your floors look cloudy and can be a real headache to fix later on.
Are There Good Eco-Friendly Cleaning Solutions?
Absolutely. As more people look for greener options, the market for effective, environmentally friendly cleaning products has really grown. You can now easily find excellent plant-based hardwood floor cleaners that are pH-neutral and fully biodegradable.
Just a word of caution on some DIY "green" solutions you might see online. The classic vinegar and water mix is not a good choice for wood floors. Vinegar is an acid, and with repeated use, it can slowly eat away at your floor's protective finish, leaving it looking dull and vulnerable. For the long-term health of your hardwood, sticking with a professionally formulated eco-friendly cleaner is a much safer bet.
At AG Carpet Specialists, we have years of hands-on experience bringing the natural beauty back to hardwood floors. If you're struggling with a tough cleaning job or just want the peace of mind that comes with a professional finish, our certified technicians are ready to help. See what a difference our expertise can make in your home.



