

To get your engineered hardwood floors looking their best, you first need to understand what makes them tick. Unlike solid wood, this flooring has a real wood veneer on top of a layered core. This unique construction means it needs specific care to protect both the finish and the structure itself. Using the right tools and, crucially, pH-neutral cleaners, is the secret to avoiding any damage.
What You Need to Know Before You Clean
Before a single drop of cleaner touches your floor, it’s vital to know exactly what you’re working with. Engineered hardwood isn't all the same; its construction can vary quite a bit, which directly impacts how you should clean it. The most important part is the top wear layer—that thin slice of real hardwood you actually see and walk on.
The thickness of this layer and, more importantly, its finish, will dictate your entire cleaning strategy. Most finishes fall into one of three categories: polyurethane, oil, or wax. Each one reacts very differently to moisture and cleaning products.
- Polyurethane/Urethane Finish: This is the most common type and acts like a protective, plastic-like coating. It's tough, pretty resistant to stains and water damage, and generally easier to clean.
- Oil or Wax Finish: These finishes soak into the wood itself, giving a more natural look but demanding a gentler touch. They're much more sensitive to harsh chemicals and too much water.
Understanding Your Floor's Construction
Figuring out your floor's finish is your first job. If you’re not sure, it's always best to check with the manufacturer or the original installer. Getting this right prevents costly mistakes, like accidentally stripping an oil finish or leaving a cloudy film on a polyurethane coat.
Engineered hardwood’s layered core gives it more stability than solid wood, which is a huge advantage in the UK’s changeable climate. In fact, it's why around 55% of UK homeowners with wood floors choose engineered options. If your floor has a wear layer of 4mm or more, you might even be able to refinish it a couple of times, giving it a much longer life.
Key Takeaway: The secret to cleaning engineered hardwood effectively isn't just about technique. It’s about knowing your material. Identifying your floor’s wear layer and finish is the most critical first step.
Choosing the Right Cleaning Products
Once you know the finish, picking a safe cleaner is the next hurdle. It's absolutely essential to choose products that won't harm your flooring. Understanding what pH neutral cleaners are is crucial for safely maintaining your engineered hardwood. These gentle solutions clean well without stripping away protective finishes or causing discolouration. This principle applies to both engineered and solid wood, a topic we cover in more detail in our comprehensive guide on how to clean wood floors.
Your Essential Floor Cleaning Toolkit
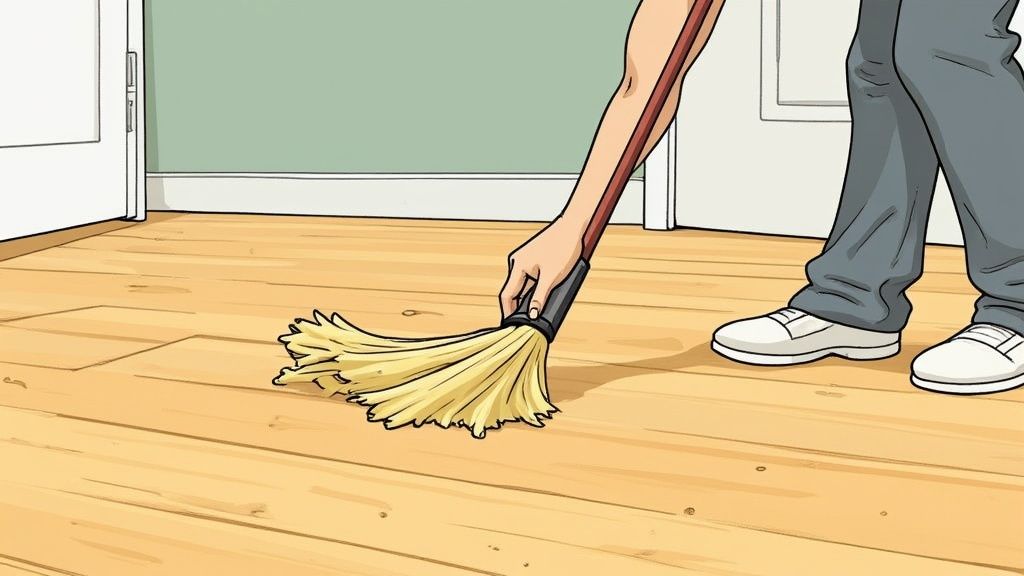
Before you even think about mopping, let’s talk tools. Getting your floor cleaning toolkit right from the start is genuinely the most important step you can take to protect your engineered hardwood from accidental damage. I've seen it time and time again – using the wrong equipment leads to scratches, a dull finish, or even warping.
Think of these tools as an investment in keeping your floors looking fantastic for years. The good news? You don't need a cupboard full of expensive, complicated gadgets. Often, the simplest tools are the most effective because they’re designed to be gentle.
The Right Tools for the Job
Your main goal here is to get rid of dust, grit, and daily grime without scuffing the surface or letting too much moisture seep in. That means picking tools specifically made for more delicate finishes.
Here’s what your go-to equipment should include:
- A Soft-Bristle Broom: This is your first line of defence. It’s perfect for sweeping up daily dust and debris without scouring the protective top layer of your floor.
- A Microfiber Mop: Microfiber is an absolute game-changer for engineered wood. Its fibres are brilliant at attracting and trapping dirt, and you can wring it out until it’s just damp, which is key to minimising water exposure.
- A Suitable Vacuum Cleaner: Not all vacuums are created equal. You need one with a dedicated hard floor setting that disengages the beater bar (the stiff, rotating brush). A spinning brush bar is a fast track to fine scratches and even small dents.
There’s a clear trend towards protecting quality flooring, and the market reflects it. The UK floor cleaning equipment market was valued at around USD 449 million in 2018 and is expected to hit nearly USD 819 million by 2025. This surge, particularly in specialised vacuums, shows just how many homeowners are trying to get it right. You can read more about the trends in the UK floor cleaning equipment market from Grand View Research.
Tools to Strictly Avoid
Knowing what not to use is just as important as knowing what to use. Some common cleaning tools are a real risk to your floors and should be kept well away.
Critical Warning: Never, ever use a steam mop on engineered hardwood. The intense heat and moisture can get into the seams between the planks, causing the core layers to swell up and separate. This kind of damage is almost always irreversible.
You’ll also want to steer clear of abrasive scouring pads and stiff-bristled brushes. They will quickly dull or even strip the finish, leaving your beautiful wood vulnerable. For a look at some powerful machines that are safe, check out our guide on the best hardwood floor cleaning machines.
Safe and Simple Cleaning Solutions
You don’t need a cabinet full of harsh chemicals to get a sparkling clean. In my experience, some of the most effective solutions are eco-friendly and can be mixed with things you probably already have in your kitchen.
Mixing up your own cleaner is simple, cost-effective, and safe for your floors when done right. Here are a few recipes I recommend.
DIY Eco-Friendly Cleaner Recipes
| Solution Purpose | Ingredients | Mixing Ratio | Best For |
|---|---|---|---|
| Everyday Clean | White Vinegar & Warm Water | 60ml of vinegar to 4 litres of water | General cleaning, cutting through light grime |
| Sticky Spill Remover | Mild pH-Neutral Soap & Water | A few drops of soap to 4 litres of water | Food spills, sticky spots from drinks |
| Gentle Disinfectant | Isopropyl Alcohol & Water | 1 part alcohol to 4 parts water | Sanitising high-traffic areas without harshness |
| Scented Refresher | Water, Vinegar & Essential Oil | 60ml vinegar, 4L water, 5-10 drops of oil | Leaving a pleasant, natural scent after cleaning |
These simple mixtures prove you don't need to rely on store-bought formulas.
For a standard clean, the white vinegar solution is fantastic. The mild acidity is just enough to cut through grime without leaving behind a dulling residue. The golden rule is to always wring your mop out until it’s barely damp to the touch before it meets the floor. This simple habit makes your cleaning routine both safe and incredibly effective.
Building a Simple and Effective Cleaning Routine
Consistency really is the key to keeping engineered hardwood looking fantastic. A good cleaning routine doesn't have to be complicated or take up hours of your week; it’s all about creating simple, regular habits. It's best to think of it as preventative care—by dealing with dust and grit before they have a chance to build up, you’re stopping those tiny, finish-dulling scratches from ever happening.
The cornerstone of any solid routine is a bit of daily attention. This doesn't mean you need to do a full deep clean every single day, but a quick sweep or vacuum makes a world of difference. Your high-traffic zones, like hallways, kitchens, and entranceways, are the main offenders for collecting the abrasive little particles that can wear down your floor's finish over time.
Daily and Weekly Care Schedule
Breaking down the tasks into a simple schedule makes cleaning your engineered hardwood floors feel almost effortless. It’s a great way to stop dirt from becoming a bigger, more stubborn problem down the line.
- Daily Task (5 Minutes): Give the busiest areas a quick once-over with a soft-bristle broom or a vacuum. If you’re using a vacuum, make sure it’s on a hard floor setting with the beater bar turned off! This simple step is your best line of defence against surface wear from dust, crumbs, and pet hair.
- Weekly Task (15-20 Minutes): Once a week, set aside a bit more time for a more thorough vacuum of the entire floor, followed by a damp mop. This combination tackles the finer dust and light grime that a quick sweep can sometimes miss.
This two-pronged approach is incredibly effective. The daily sweep keeps the surface clear of debris, while the weekly damp mop lifts away any settled grime without oversaturating the wood. Finding this balance is crucial, as too much water is the number one enemy of engineered flooring.
A consistent cleaning schedule is about more than just looks; it’s about preservation. By removing abrasive grit daily, you’re actively extending the life of your floor’s protective finish.
Mastering the Damp Mop Technique
When we say "damp mop," we really mean it. Your mop head should be wrung out so thoroughly that it feels only slightly damp to the touch. It should never, ever leave visible puddles or even watery streaks behind on the floor.
A floor that has been correctly damp-mopped will air-dry almost instantly, usually within a minute or two. For the best possible results, always mop in the same direction as the wood grain. This little trick helps to clean out the subtle textures in the wood and prevents streaking, leaving you with a much more uniform and professional-looking finish. Using a microfibre mop is your best bet here, as the material is brilliant at grabbing dirt without needing excess water.
This routine forms the core of great floor care, but there are always more ways to protect your investment. To explore this topic further, you can find valuable advice on how to maintain hardwood floors in another one of our detailed guides. By integrating these simple habits, you'll ensure your engineered hardwood remains a stunning feature in your home for years to come.
How to Handle Spills, Stains and Scuffs
No matter how careful you are, life eventually happens on your floors. A dropped glass of juice, a muddy paw print, or a scuff mark from a shoe can feel like a disaster on your beautiful engineered hardwood. The key is speed and technique; acting fast stops a minor accident from becoming a permanent problem.
The absolute first rule for any liquid spill is to blot it up immediately. Don't wait. Grab a clean, dry microfibre cloth or paper towel and absorb the liquid, working from the outside of the spill inwards to stop it from spreading. Never, ever rub, as this can force the liquid into the seams between the planks.
Tackling Common Floor Mishaps
Different marks call for different tactics. For that sticky residue left behind from food or drinks, a slightly damp cloth with a tiny drop of your pH-neutral cleaner is usually all you need. For more stubborn issues like scuffs or faint stains, you’ll have to get a bit more specific.
Here’s our approach for some of the most frequent offenders:
- Dark Scuff Marks: Usually left by the rubber soles of shoes. Believe it or not, a clean tennis ball is your secret weapon here. Just rub it firmly over the scuff, and the friction should lift the mark right off without damaging the floor's finish.
- Sticky or Greasy Spots: For things like dropped food or oily residue, a cloth dampened with an approved wood floor cleaner should be your first port of call. If you're dealing with tougher grease, a heavily diluted solution of isopropyl alcohol on a cloth can help cut through the oil.
- Minor Water Spots: If a small spill has left a light-coloured ring, it often means moisture has only affected the top finish layer. You can sometimes remove these by placing a dry cotton cloth over the spot and gently ironing it on a low, no-steam setting for a few seconds at a time. The heat helps to evaporate the trapped moisture.
It's always a good idea to test any spot treatment on an out-of-the-way area first—like under the sofa or in a corner—just to make sure it doesn’t react poorly with your floor’s specific finish.
Dealing With Tougher Stains
For stains that have had more time to set, a more patient approach is needed. A simple paste made from baking soda and a few drops of water can be surprisingly effective. Apply the paste to the spot, let it sit for a few minutes, and then gently wipe it away with a damp cloth.
It’s crucial to remember that engineered hardwood has its limits. For ingrained damage or deeply set stains, aggressive scrubbing will only make things worse and can damage the finish. Knowing when to call for professional help is key. For those really challenging situations, you might find our guide on the deep cleaning of hardwood floors provides the more advanced insights you need.
Common Cleaning Mistakes and How to Avoid Them
Sometimes, the biggest threat to your beautiful engineered hardwood floors comes from a well-intentioned but misguided cleaning effort. Over the years, I've seen countless floors damaged not by neglect, but by using the wrong products or techniques. Honestly, understanding what not to do is just as important as knowing the right way to clean.
Many common household cleaners and tools are surprisingly destructive to an engineered wood finish. These mishaps often happen because people treat their engineered floor like it's tile or vinyl, but its real wood top layer is far more sensitive. Even small mistakes, when repeated over time, can lead to costly and irreversible damage.
The Problem with Too Much Water
The most frequent mistake I see is using too much water. A sopping wet mop might feel like it's getting the job done, but it's actually your floor's worst enemy.
Excess moisture seeps into the seams between planks, where it can be absorbed by the inner core layers. This absorption causes the core to swell, leading to planks buckling, warping, or separating. Once this happens, the damage is almost always permanent. A properly wrung-out, barely damp mop is the only safe approach.
Harsh Chemicals and Abrasive Tools
Another common pitfall is reaching for the wrong cleaning products. Generic, all-purpose cleaners or solutions containing ammonia or wax can be disastrous for your floors.
- Ammonia-Based Cleaners: These are highly alkaline and will strip the protective polyurethane finish right off your floor, leaving it looking dull, cloudy, and vulnerable to scratches.
- Wax or Oil Soaps: Products like oil soap don't actually clean the surface; they leave behind a greasy residue that builds up over time, attracting more dirt and making your floor look grimy.
- Abrasive Scrubs: Steel wool or harsh scouring pads will permanently scratch and scuff the finish, destroying its lustre and protective qualities for good.
This infographic clearly shows the difference between a safe, pH-neutral cleaner and a typical harsh, alkaline alternative.
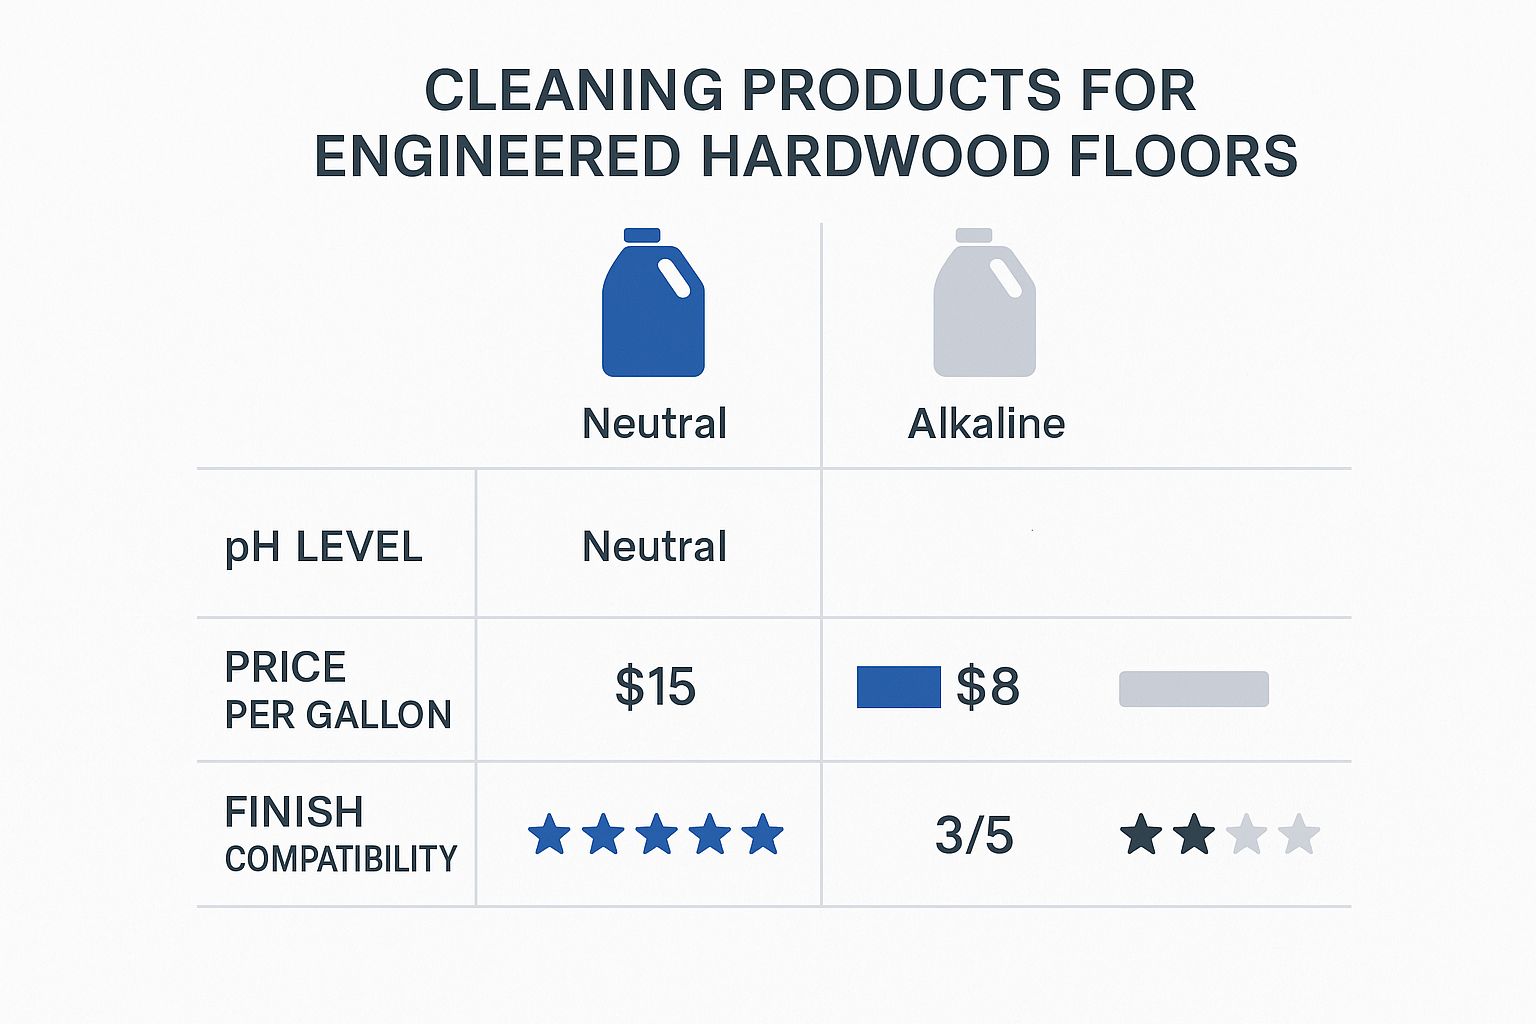
As you can see, the pH-neutral option is far more compatible with your floor's finish, justifying a slightly higher price for long-term protection.
Why Steam Cleaning Is a Major Risk
One of the most damaging mistakes you can make is using a steam cleaner. The combination of intense heat and high-pressure moisture is a recipe for disaster on engineered wood. Steam forces moisture deep into the wood's core and can even melt the adhesives holding the layers together.
Expert Warning: Using a steam mop on engineered hardwood can cause delamination, where the top wood veneer peels away from the core. This type of damage is often not covered by warranties and is extremely difficult to repair.
While it may seem like a great way to sanitise, the risk is simply too high. To learn more about the specific dangers, our detailed article explores why steam cleaning wooden floors is a practice to avoid at all costs.
To keep things simple, I've put together a quick guide on the essential do's and don'ts.
Do's and Don'ts of Engineered Hardwood Cleaning
| Do | Don't |
|---|---|
| Do use a microfibre mop that's been well wrung-out. | Don't use a soaking wet string or sponge mop. |
| Do use a pH-neutral cleaner specifically for wood floors. | Don't use vinegar, ammonia, or all-purpose cleaners. |
| Do sweep or vacuum with a soft-bristle head regularly. | Don't use abrasive tools like steel wool or scouring pads. |
| Do place protective pads under furniture legs. | Don't ever use a steam cleaner on your engineered wood. |
| Do clean up spills immediately with a soft, dry cloth. | Don't use oil soaps or wax-based polishes. |
By steering clear of these common errors, you'll be actively preserving the life and beauty of your flooring for years to come.
Looking After Your Floors for the Long Haul
A consistent cleaning routine is brilliant for keeping your floors looking good day-to-day, but protecting them long-term is another game entirely. It's really about preventing problems before they even start. By creating a protective environment, you stop damage in its tracks and ensure your engineered hardwood stays beautiful for years, not just months.
This really just involves shifting your mindset from only cleaning up messes to actively safeguarding your investment. The small, simple adjustments you make today will pay you back tenfold in the future condition and lifespan of your floors.
Simple Steps to Protect Your Floors
You don't need to go to extreme lengths to protect your floors. In reality, some of the most effective strategies are the simplest ones and take just a few moments to put in place. They all boil down to tackling the two biggest culprits of floor damage: abrasive grit dragged in from outside and scrapes from furniture.
These proactive steps create a vital buffer between daily life and your floor's finish:
- Good Quality Doormats: Put a sturdy, effective doormat at every single door that leads outside. A good mat is your first line of defence, trapping the vast majority of dirt, grit, and moisture from shoes before it ever gets a chance to be tracked onto your wood.
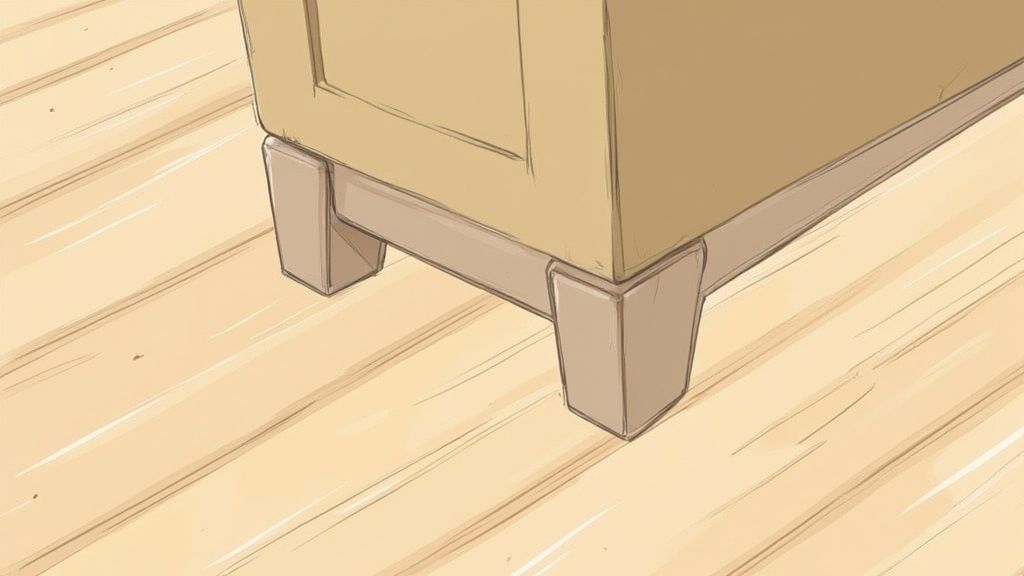
- Felt Pads on Furniture: This is absolutely essential. Stick soft felt pads on the bottom of every piece of furniture—chairs, tables, sofas, you name it. Scratches from furniture being moved are one of the most common, and most easily preventable, types of damage.
- Area Rugs in Busy Spots: Think about using rugs in hallways, living areas, and under the dining table. They don't just add a bit of style; they absorb the wear and tear in the busiest parts of your home, preserving the floor underneath.
By putting felt pads on all your furniture legs, you can eliminate an estimated 80% of potential deep scratches. It’s a tiny task that offers enormous protection against the most common forms of floor damage.
Keeping the Environment Stable
While engineered hardwood is more stable than solid wood, it's not completely immune to its environment. Big swings in humidity can still cause issues over time, as the wood naturally expands and contracts. Keeping your indoor climate as stable as possible is a key part of long-term care.
Here in the UK, where humidity can change a lot between seasons, aiming for a consistent indoor level between 30% and 50% is ideal. This helps stop the planks from gapping, cupping, or buckling. You might consider using a dehumidifier during damp summer months or a humidifier in a very dry, centrally-heated home in winter—it can make a real difference.
When to Call in a Professional
Even with the best care in the world, years of foot traffic will eventually start to show. It’s important to recognise the signs that your floor might need more than just a good clean. If you notice a widespread dullness that cleaning doesn't fix, deep scratches that have gone through the finish, or significant wear in certain areas, it might be time for some professional help.
For engineered hardwood, this usually means either a recoat or a refinish. A recoat involves lightly buffing the existing finish and applying a new top coat to bring back its shine and protection. A full refinish, which involves sanding down to the raw wood veneer, is only an option if your floor has a thick enough wear layer (usually 3mm or more). It's always best to check the manufacturer’s specifications before even considering this.
At AG Carpet Specialists, we understand that your floors are a significant investment. If you're facing wear and tear that goes beyond a simple clean, our professional wood floor restoration services can bring back their original beauty. Contact us today for a free quotation and see how we can help.



