
That favourite armchair isn't just a piece of furniture; it's the heart of the room where daily life happens. Cleaning armchair upholstery yourself is not only possible but, with the right know-how, can tackle everything from everyday grime to those little accidents. This guide is here to walk you through how to refresh your beloved seat with confidence, starting with the most critical step: figuring out what fabric you're working with.
Bringing Your Favourite Armchair Back to Life
Your armchair sees it all, doesn't it? From morning coffees to cosy film nights, it's a silent witness to our daily routines. Over time, it naturally gathers not just memories but also dirt, spills, allergens, and the general signs of being well-loved. Forget generic advice; we're going to give you the practical knowledge you need to properly refresh your armchair's upholstery.
The first step in reviving your chair is understanding exactly what it needs. The most important thing, which will guide your entire cleaning process, is identifying the fabric type. Using the wrong product can lead to disaster—think irreversible discolouration or shrinkage—turning a simple clean-up into a costly headache.
Why DIY Upholstery Cleaning Matters
Taking this task on yourself is about more than just having a cleaner chair. There are some real, practical benefits:
- Cost Savings: Let's be honest, professional upholstery cleaning can be expensive. A DIY job keeps that money in your pocket while still delivering brilliant results.
- A Healthier Home: Regular cleaning pulls out all the accumulated dust, pet dander, and other allergens that can impact the air quality in your home.
- Prolonged Furniture Life: Getting rid of abrasive dirt particles and treating stains quickly stops fibres from breaking down, helping your armchair last much longer.
- Immediate Results: You can jump on spills and spots the moment they happen, stopping them from setting in and becoming a permanent feature.
Think of this as your complete guide to bringing that cherished seat back to its best. We’ll go over everything, from using simple household tools to applying the right cleaning solutions for a deep, satisfying clean.
This guide will walk you through the entire process, making sure you have the knowledge to get it right. For a wider perspective, you can also check out our general advice on how to clean upholstery at home to build your confidence even further.
Your Pre-Cleaning Preparation Guide
The secret to a fantastic upholstery clean doesn't really lie in the scrubbing. It's all in the prep work. Taking a few moments to get everything ready is what protects your furniture from accidental damage and guarantees a much better result. This is more than just grabbing a cloth and getting stuck in; it's a methodical approach that pays off.
First things first, you need to play detective. Find the manufacturer’s care tag on your armchair. It’s often tucked away under a cushion, along a seam, or on the underside of the frame. This little tag holds the most important piece of information you’ll need.
Decode Your Armchair's Cleaning Code
That tag will have a single letter on it, which is the cleaning code. This tells you exactly what kind of cleaning agents are safe for your specific fabric. Trust me, ignoring this is a huge gamble. Using the wrong product can lead to permanent watermarks, colour bleeding, or even fabric deterioration.
Here's a quick guide to help you understand your armchair's cleaning tag and pick the right products.
| Code | Meaning | Approved Cleaning Agents |
|---|---|---|
| W | Water-Based Cleaner | Safe to use water and water-based cleaning solutions. |
| S | Solvents Only (Dry Clean) | Use a water-free, dry-cleaning solvent. Water will damage it. |
| W/S | Water or Solvent | You have flexibility; either water-based or solvent-based cleaners are fine. |
| X | Vacuum Only | Do not use any liquid. Brushing and vacuuming are the only safe methods. |
Understanding this code is absolutely vital. If you're tackling this yourself, our comprehensive guide on DIY upholstery cleaning offers more specific tips for different fabric types.
The Importance of a Thorough Vacuum
Once you know which cleaners are safe to use, the next job is to get rid of all the loose dirt and debris. If you skip this, all those tiny crumbs and specks of dust will just turn into muddy streaks the moment you add liquid. Grab your vacuum's upholstery attachment and work your way across the entire chair.
Pay close attention to all the spots where dirt loves to hide—along the seams, in the crevices, and around any button tufting. If the cushions come off, remove them and vacuum everything: both sides of the cushions and the chair frame underneath. You'd be surprised what a difference this makes.
The one thing to remember is simple but crucial: never apply a cleaning solution to a surface you haven't vacuumed first. You're just making a bigger mess by turning dry dirt into wet mud.
This focus on a clean start isn't just our recommendation. A 2021 UK survey revealed that 82% of people have become more conscious of how they clean their homes. When done correctly, professional methods can remove up to 98% of pollutants from upholstery—a standard that a proper DIY prep helps you get much closer to.
Finally, before you go all in, always spot-test your cleaning solution. Find a hidden area, like on the back of the chair or under a cushion flap. Apply a tiny amount, let it dry completely, and then check for any discolouration or texture change. This simple test is your ultimate safety net against a cleaning disaster.
Choosing the Right Cleaning Solution
The first step to cleaning armchair upholstery and getting it right is choosing your cleaning solution. It’s a critical decision. With everything from kitchen cupboard staples to professional-grade products on the market, picking the wrong one could do more harm than good. Your choice should always come down to three things: your armchair's cleaning code, the type of stain you're facing, and what you’re comfortable using on your furniture.
For most general cleaning, especially on fabrics with a ‘W’ or ‘W/S’ code, a simple homemade solution is often more than enough. These are cheap, easy to make, and you probably have the ingredients already.
Effective DIY Cleaning Recipes
A very popular and gentle option is a simple mix of mild washing-up liquid and warm water. A couple of drops in a bowl of water is all you need to create a sudsy solution that’s perfect for lifting light surface dirt and fresh spills from synthetics like polyester or nylon.
Another fantastic homemade choice involves white vinegar, which is well-known for its gentle disinfecting and deodorising abilities. Mixing a 50/50 solution of white vinegar and warm water can effectively handle light stains and get rid of lingering smells without any harsh chemicals. This works particularly well on natural fibres that are safe for water-based cleaning, but you absolutely must do a spot test first.
The real secret to using any DIY solution is to apply it sparingly. You want to dampen the fabric, not drench it. Soaking your armchair is a fast way to get watermarks and even mildew, so a light touch is always best.
This is a great place to start, and for more in-depth advice on handling different fabrics, have a look at our guide on how to clean upholstery at home, which dives into various techniques.
When to Use Commercial Cleaners
Sometimes, a simple DIY mix just won't cut it. For ingrained grime or really stubborn stains, you’ll need to bring in something with a bit more power, and that’s where commercial upholstery cleaners come in. When you’re picking one off the shelf, it’s vital to check the active ingredients.
For organic stains – things like food spills, drinks, sweat, or pet messes – an enzyme-based cleaner is your best friend. These products use specific enzymes that break down the proteins found in organic matter, essentially "eating" both the stain and the smell it leaves behind. They are far more effective on these kinds of accidents than a standard detergent.
If your armchair is just generally grimy and needs a full refresh, a proper upholstery shampoo is an excellent choice. These are designed to create a low-moisture foam that lifts dirt right out of the fibres without soaking the padding underneath.
Here’s a quick breakdown to help you choose:
| Cleaner Type | Best For | Fabric Compatibility | Key Benefit |
|---|---|---|---|
| DIY Vinegar/Soap | Light dirt, general freshening up | 'W' or 'W/S' coded fabrics | Cost-effective and gentle |
| Enzyme Cleaner | Organic stains (food, pets, sweat) | 'W' or 'W/S' coded fabrics | Targets and eliminates stain source |
| Upholstery Shampoo | Heavy, widespread grime | 'W' or 'W/S' coded fabrics | Deep cleans without over-wetting |
In the end, whether you go for a homemade recipe or a specialised product, the most important thing is to match your solution to the problem. Always follow the manufacturer's instructions, and never, ever skip the spot test. That one simple check is what ensures your efforts will revive your armchair, not ruin it.
A Practical Walkthrough of the Deep Cleaning Process
Right, you’ve done the prep work and your cleaning solution is ready to go. Now for the main event: cleaning your armchair upholstery. This is where a little bit of patience really pays off. The key is to be methodical and gentle – a thorough but careful approach will always give you the best results.
Grab a clean, white microfibre cloth and dampen it with your cleaning solution. It’s absolutely vital that the cloth is only damp, not soaking wet. This is the biggest mistake I see people make. Drenching the fabric can leave ugly watermarks, cause the material to shrink, and even lead to mildew growing deep inside the padding.
Applying the Cleaner Correctly
Start with a small, manageable part of the armchair, like one of the arms or a single cushion. Using light, circular motions, apply the solution to the fabric. This technique is brilliant for lifting dirt out of the weave without being too harsh. Whatever you do, resist the urge to scrub like mad – you’ll only risk fraying the fibres or pushing the dirt deeper in.
Once you've worked the cleaner in, take a second microfibre cloth, this time lightly dampened with plain water. Go back over the same area to "rinse" it, gently blotting to lift away both the cleaning solution and all the grime it’s loosened. You're trying to lift the dirt out, not just spread it around.
The most important thing to remember here is 'less is more'. Use the absolute minimum amount of solution and water you need. This is the secret to preventing water damage and it drastically cuts down the drying time later on.
This simple guide breaks down the essential steps, from the first vacuum to the final blot dry.
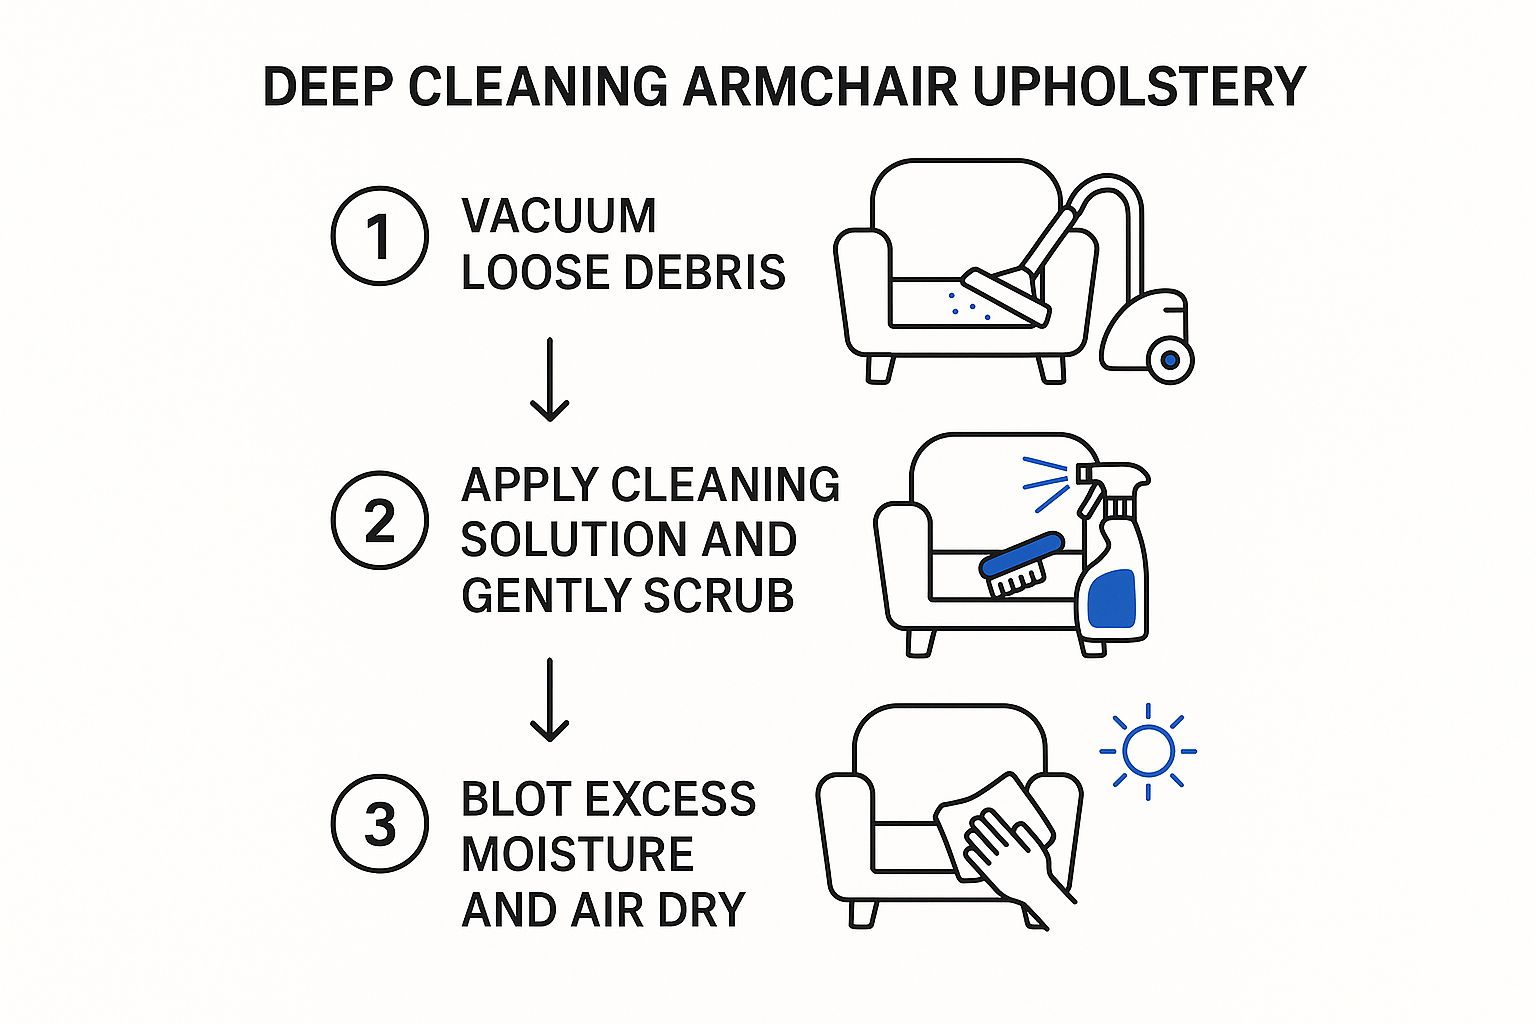
As you can see, each stage logically follows the next, ensuring you get a safe and effective clean.
Tackling Seams and Tougher Areas
Continue working across the entire armchair, piece by piece. Make sure you slightly overlap the sections you're cleaning to avoid leaving any harsh lines or patches. This is how you get that uniform, streak-free finish. Pay extra attention to the high-contact spots, like the armrests and the headrest, as they’re magnets for body oils and daily grime.
For those really fiddly areas where dirt loves to hide – think seams, piping, and around buttons – a soft-bristled brush is your best friend. An old toothbrush works perfectly.
- Lightly dip the brush into your cleaning solution.
- Gently work it into the crevices with small, careful movements.
- Straight away, blot the spot with a clean, dry cloth to pull out the dirt and any extra moisture.
This kind of detailed work is what separates a quick wipe-down from a proper deep clean. It shows you’re taking real care of your furniture. It’s no surprise that the UK's professional upholstery cleaning market was valued at nearly USD 4 billion in 2022. It just goes to show how much we value keeping our homes looking their best. If you're interested in the market trends, you can read more on Grand View Research. By following these steps, you can get a result that looks truly professional, bringing your favourite armchair back to life.
How to Remove Tough Stains from Upholstery
Even after a thorough deep clean, a stubborn stain can feel like the final boss you just can't beat. Let's be honest, spills are a part of life, but they don’t have to mean disaster for your favourite armchair. The real secret to successful stain removal is acting fast and, more importantly, using the right technique for that specific spill.
The most common mistake I see people make is frantically rubbing a fresh spill. All this does is force the stain deeper into the fabric's fibres, making your job ten times harder. Instead, your mantra should be blot, blot, blot. Grab a clean, dry cloth, press it firmly onto the stain, and lift as much of the liquid as you can before you even think about reaching for a cleaning solution.
Tackling Specific Stain Types
Different stains demand different battle plans. A one-size-fits-all approach is a recipe for failure and can sometimes set the stain permanently. Here’s a quick guide to handling some of the usual suspects.
- Red Wine and Coffee: For these tannin-based stains, blot immediately. Next, lightly spritz the area with a simple mix of equal parts white vinegar and water. Let that sit for a few minutes, then get back to blotting with a fresh, damp cloth.
- Grease and Oil: Water is your enemy here. Your best move is to sprinkle a generous amount of cornflour or bicarbonate of soda directly onto the mark. Give it a good 15-20 minutes to absorb the grease, then vacuum it all up. Any leftover mark can be treated with a dry-cleaning solvent (check for an 'S' code on your furniture's care tag first).
- Ink Stains: A little rubbing alcohol on a cotton bud can be surprisingly effective on water-based ink. Just remember to dab gently, working from the outside of the stain inwards to stop it from spreading. Always test this on a hidden area first, as alcohol can be harsh on certain fabric dyes.
The single most important takeaway for stain removal is to always work from the outside in. This technique contains the spill and prevents you from accidentally making it bigger while you clean.
Understanding Protein Stains
Stains from organic sources like milk, blood, or pet accidents are what we call protein stains. There’s one golden rule for these: always use cool water. Using hot water can effectively "cook" the protein, bonding it permanently to the fabric fibres.
Blot the stain thoroughly first, then treat it with a specialised enzyme cleaner. These products are formulated to break down the actual protein molecules, which is how they eliminate both the visible stain and any lingering odours. The demand for these kinds of professional solutions is growing; in 2023, the UK contract cleaning services market, which includes upholstery care, was valued at an impressive USD 15.9 billion. You can read more about these industry trends on Credence Research.
Many of these same principles apply just as well to other surfaces in your home. For more expert tips, you might find our guide on how to remove stubborn carpet stains really helpful. Remember, a little know-how can turn a potential disaster into nothing more than a minor cleanup.
Drying and Finishing for a Professional Result
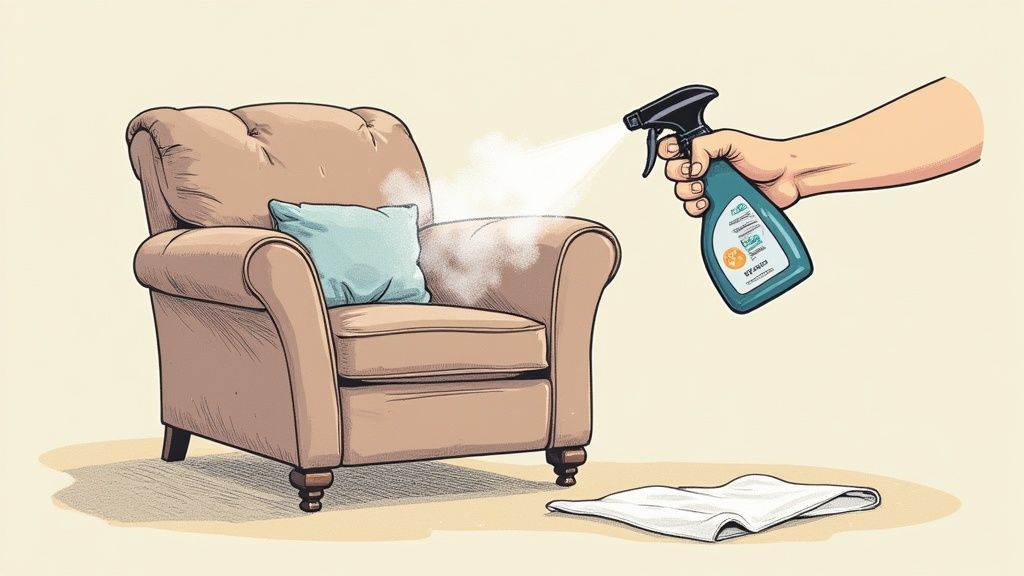
Don't be tempted to think the job is done once the last bit of grime is gone. The final, and arguably most critical, stage of cleaning armchair upholstery is the drying process. Getting this right is absolutely essential if you want to prevent frustrating problems like mildew, mould, and those dreaded water rings that can undo all your hard work.
Patience is your best friend here. While your first instinct might be to speed things up, you must resist the urge to use direct heat. Never, ever use a hairdryer or shove the armchair next to a radiator. That kind of intense heat can shrink natural fibres, warp synthetics, and even cause the colours to fade, leaving you with permanent damage.
Creating the Ideal Drying Environment
The most effective approach is all about promoting great airflow. Simply opening a few windows to get a cross-breeze going or setting up a fan to circulate air around the chair is the way to go. This gentle method allows the moisture to evaporate evenly and safely from deep within the fabric.
Proper drying isn't just about how the chair looks; it's about the health of your furniture and your home. Damp upholstery is the perfect breeding ground for mould spores, which can start to appear in as little as 24 to 48 hours in the right conditions. For a more detailed look at effective drying techniques, which apply just as well to furniture, you can learn about the best way to dry carpet after cleaning in our related guide.
Here's a top tip from the pros: To avoid water rings, always clean an entire section (like a full seat cushion) from seam to seam, rather than just spot-cleaning a small patch. This pushes any moisture lines to the natural edges where they won't be noticeable once dry.
The Final Flourish for Fabric
Once you are completely certain the armchair is bone dry—and this could take several hours or even overnight—it's time for the finishing touch. This is the simple step that truly elevates your work from a decent clean to a professional-quality restoration.
Grab a soft-bristled brush (a clothes brush works perfectly) and gently sweep it all over the fabric. This quick action achieves two important things:
- It fluffs up the pile: This restores that lovely soft texture, which is especially important for materials like velvet or corduroy.
- It aligns the fibres: This ensures the material has a uniform appearance, getting rid of any matted or flattened spots left over from the cleaning process.
This final brush-down is what gives your armchair that fresh, 'just-like-new' look and feel, making all your effort truly rewarding.
Answering Your Upholstery Cleaning Questions
Over the years, we've heard just about every question there is when it comes to cleaning armchair upholstery. Let's tackle some of the most common queries we get, so you can clean with confidence.
How Often Should I Clean My Armchair?
For everyday maintenance, a good vacuum every week or two is a brilliant habit to get into. It stops loose dirt and crumbs from working their way deep into the fabric.
When it comes to a proper deep clean like the one we've outlined, aim for at least once or twice a year. Of course, if your favourite armchair is in a busy part of the house or has to contend with pets and kids, you'll probably find it needs a thorough clean more often.
Can I Use a Steam Cleaner on Any Fabric?
Definitely not. This is a crucial one to get right. Steam cleaning isn't a one-size-fits-all solution for upholstery.
It’s generally fine for fabrics with a ‘W’ (water-based) or ‘W/S’ tag, but you risk doing serious, permanent damage to materials labelled ‘S’ (solvent only) or ‘X’ (vacuum only). Always, always check the care tag on your furniture first and do a quick spot test on an area nobody will see.
Here's a great little tip from the pros: The easiest way to lift stubborn pet hair before a deep clean is with a damp rubber glove. Just run your hand over the fabric and watch the hair clump together for easy removal. It works a treat.
If a DIY clean feels a bit much, or if your armchair has delicate fabric that needs an expert touch, AG Carpet Specialists provides professional cleaning to bring your furniture back to life safely. Get in touch for a free, no-obligation quotation at https://www.agcarpetspecialist.co.uk.


