

Learning how to patch a carpet is one of the most cost-effective DIY skills you can master. It lets you sort out localised damage—think burns, stubborn stains, or tears—without the massive expense of replacing the entire floor. The idea is simple: you cut out the ruined section and fit a matching piece, known as a donor patch, seamlessly into its place. It’s a trick that can instantly restore your carpet's look and add years to its life.
Why Learning to Patch a Carpet is a Game-Changer
Accidents are just a part of life. A hot iron gets knocked over, leaving a perfect scorch mark. Your lovely pet decides a corner of the living room carpet is its new favourite chew toy. A glass of red wine goes flying, creating a stain that’s never coming out.
Before you start pricing up a full replacement, just think about the value of learning a simple carpet patching repair. This isn't just about hiding an eyesore; it’s a smart, sustainable, and financially savvy approach to looking after your home.
Save a Fortune and Extend Your Carpet’s Life
The most obvious win is financial. Having a professional replace your carpet can run into the thousands, whereas a DIY patch costs next to nothing, especially if you’ve got some spare offcuts from when it was first laid.
By tackling these little issues as they pop up, you stop them from turning into big, ugly patches of wear that make a full replacement feel necessary. You’re essentially extending the lifespan of your entire carpet for the cost of a few tools and an hour or two of your time.
This proactive approach to home maintenance is definitely on the rise. We're seeing a clear shift towards repairing things rather than just throwing them away. In the UK, spending on carpets and floor coverings has shot up from around £827 million in early 2014 to nearly £1.2 billion recently. It shows we're investing more in our homes, and it makes sense to protect that investment. You can dig into more data on UK household spending over on Statista.com.
A well-done patch doesn't just cover up a mistake—it preserves the investment you’ve already made in your flooring, keeping it looking good and doing its job for years longer than you might think.
A Greener Choice for Your Home
Looking beyond your bank account, patching a carpet is also the environmentally responsible choice. Old carpets that get ripped out contribute a huge amount to landfill waste, where they can take hundreds of years to decompose.
Every time you choose to repair instead of replace, you’re making a small but genuinely meaningful contribution to reducing that waste. It’s a practical way to live a bit more sustainably without giving up on the comfort and appearance of your home.
Confidently Handle Common Household Mishaps
Once you know how to patch a carpet, you’re equipped to deal with all sorts of common household disasters. It’s an incredibly versatile skill that comes in handy for so many situations:
- Pet Damage: Perfect for repairing areas where cats have been scratching or dogs have had a good chew.
- Stubborn Stains: The ultimate solution for permanent marks from bleach, ink, or wine that no amount of scrubbing will shift.
- Burns and Scorch Marks: Easily fix damage from dropped cigarettes, candles, or hot appliances like hair straighteners.
- Furniture Indentations: Sometimes, heavy furniture leaves deep, permanent dents that just won't spring back. A patch can sort it.
Learning this one skill gives you real peace of mind. You’ll know you can handle these everyday problems without the stress or the huge expense.
Assembling Your Carpet Repair Toolkit
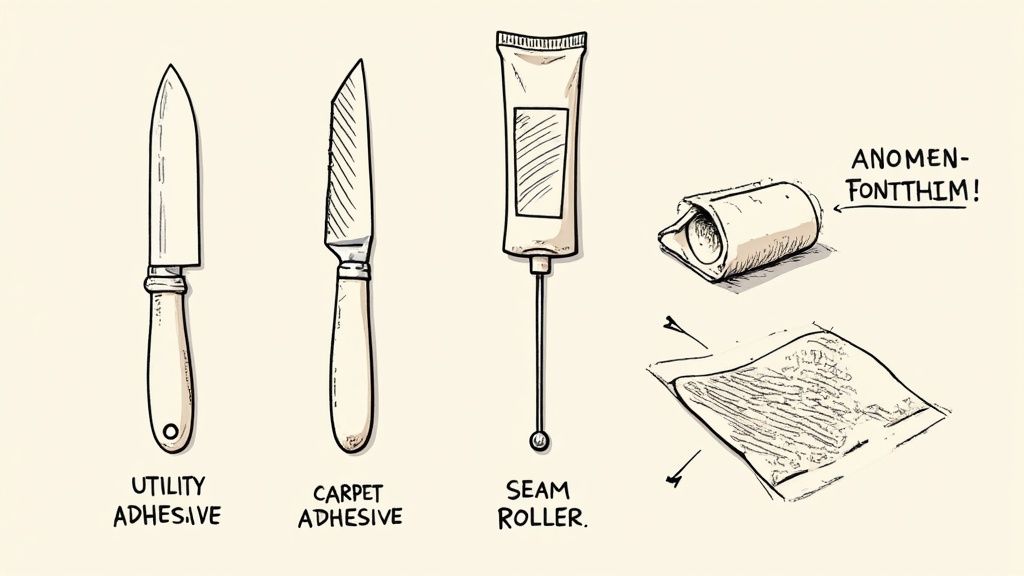
Before you even think about tackling a carpet patching repair, the first and most critical job is to get all your kit together. Honestly, having the right tools is what separates a seamless, invisible fix from a botched job that sticks out like a sore thumb.
The good news is you won't need a lorry full of professional gear. Most of the essentials are probably already lurking in your toolbox, and the rest are easy enough to pick up. The goal here is precision and creating a repair that will last.
Getting Your Hands on the Right Gear
To give yourself the best shot at a professional-looking finish, you need a few key items. Trying to make do without them will only lead to frustration and a messy result. Let’s break down exactly what you'll need.
Here’s a quick look at the essential tools and materials that will make your carpet patching project a success.
Essential Toolkit for Carpet Patching
| Tool/Material | Primary Use | Pro Tip for Selection |
|---|---|---|
| Sharp Utility Knife | Making crisp, clean cuts through both the carpet pile and its tough backing. | Always start with a fresh blade. A dull one will tear the fibres, making a clean seam next to impossible. |
| Metal Straight Edge | Guiding your knife for perfectly straight cuts on both the patch and the damaged area. | A heavy-duty metal ruler or a carpenter's square works best. Plastic can slip or get nicked by the blade. |
| Donor Carpet Piece | Providing the matching material for your patch. | If you don't have offcuts from the original installation, source a piece from inside a wardrobe or under a sofa. |
| Carpet Tape/Adhesive | Bonding the new patch securely to the subfloor or surrounding carpet. | Choose based on your carpet type. Heat-activated tape gives a stronger bond, but adhesive tape is simpler to use. |
| Seam Sealer | Preventing the cut edges of your patch and the original carpet from fraying over time. | This is an optional but highly recommended step for a durable, long-lasting repair. |
With these items ready, you have everything you need to confidently start the repair. Each tool has a specific role to play in achieving that flawless finish.
Finding the Perfect Donor Patch
The real secret to an invisible repair is the donor patch. It has to be a perfect match in colour, texture, pile direction, and even wear. This is non-negotiable.
Ideally, you'll have some offcuts left over from when the carpet was first fitted – this is the gold standard. If not, don't panic. It's time to get a bit creative. You can usually find a section of carpet to "borrow" from a spot that's never seen.
Take a look inside a built-in wardrobe, under a heavy, permanently-placed sofa, or even beneath a cabinet. You can carefully cut the piece you need from there. Nobody will ever be the wiser.
Choosing Your Bonding Agent
The final piece of your toolkit puzzle is what will hold it all together. Your choice of adhesive will directly impact how long your patch lasts, so it’s worth taking a moment to get it right.
For high-traffic areas, heat-seam tape (used with a special carpet iron) creates an incredibly strong, professional-grade bond. For a simpler, no-heat option on low-pile carpets, a high-quality double-sided adhesive carpet tape will do the trick. You can also use a liquid seam sealer around the edges to stop any future fraying.
Once your patch is in place, you'll want to help it blend in. Understanding the basics of a good clean can help merge the new and old fibres together. To learn more, check out our guide on how to deep clean carpets at home. Now that your toolkit is assembled, you're ready to get started.
The Complete Carpet Patching Process
Right, let's get down to the hands-on part of your carpet patching repair. You’ve got your tools lined up and your donor piece is ready. Now it’s time to tackle the damaged section and get that replacement fitted. This isn't a race; patience and a steady hand are your best friends here, but follow these techniques, and you'll end up with a repair you can barely see.
The idea is simple enough: cut out the bad bit, pop in the good bit. But as with most things, the magic is in the details. That’s what separates a clumsy, obvious fix from a professional, invisible one. We'll go through it stage-by-stage, from making that first cut to bedding in the new patch.
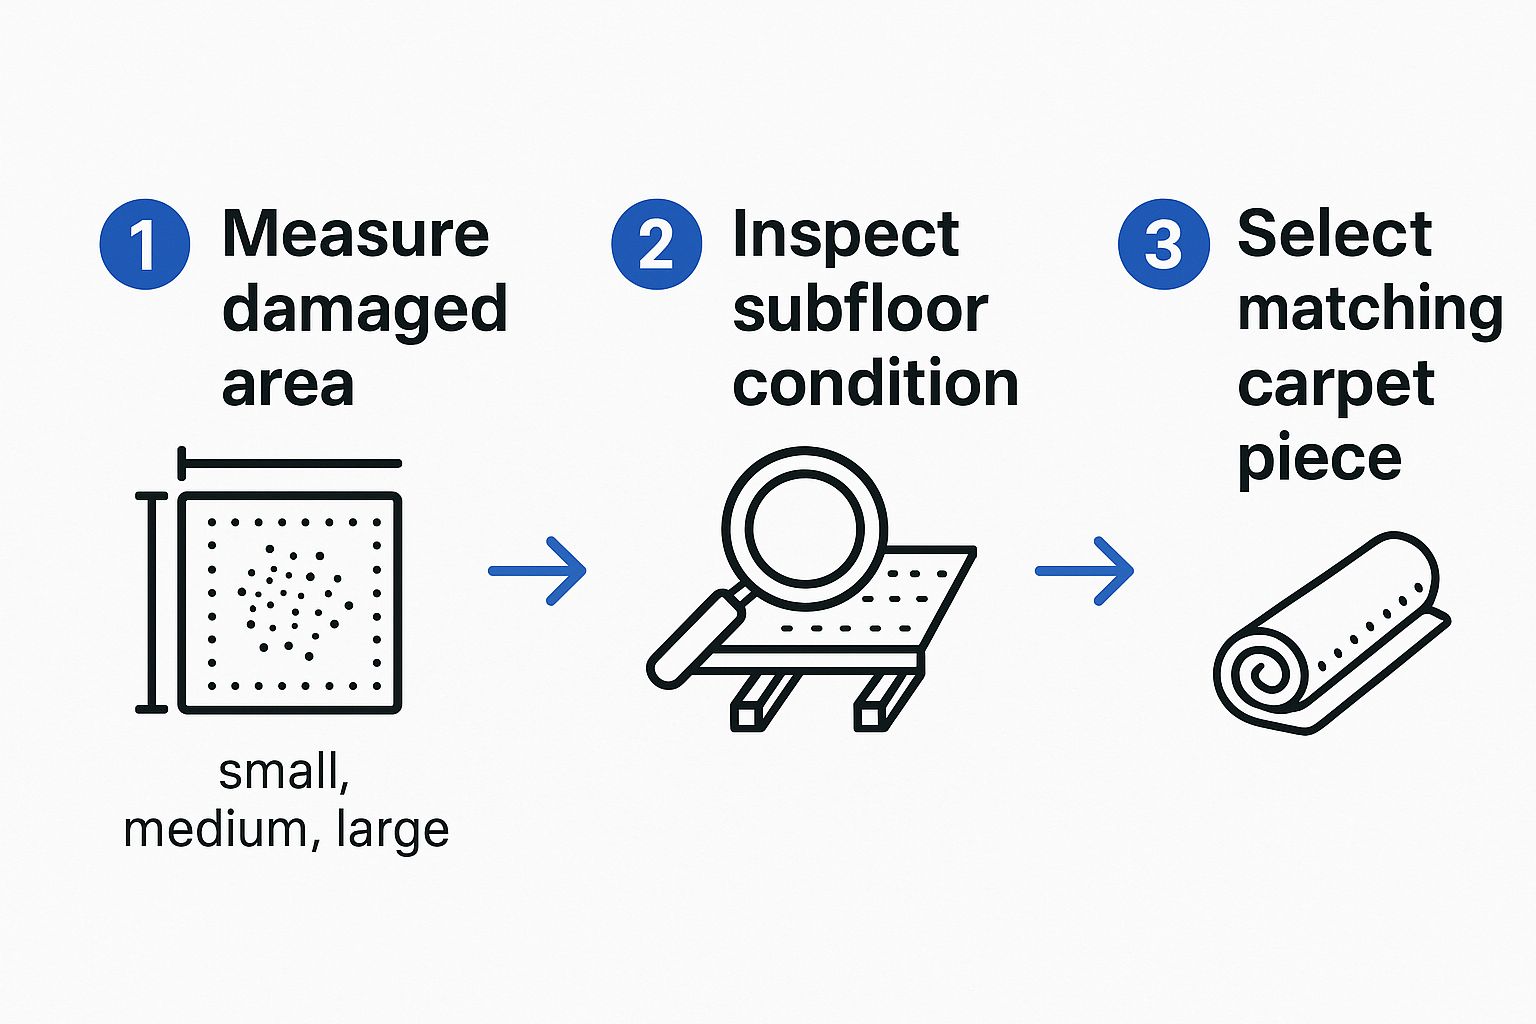
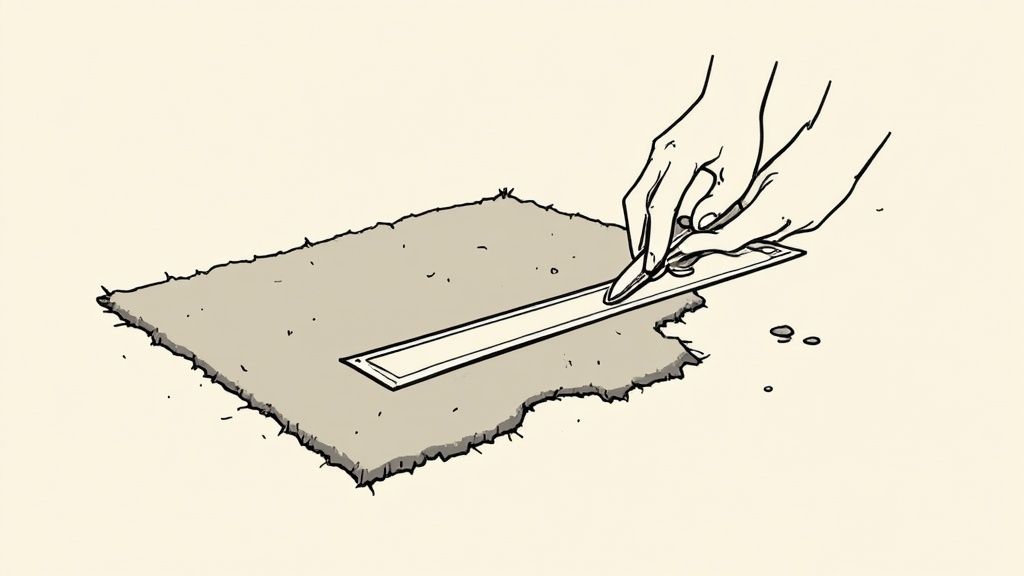
Preparing the Damaged Area for Removal
Before you even think about cutting, you need to map out exactly what needs to go. For something small like a cigarette burn, a 2-inch square might be all you need. For a bigger stain or a tear, you'll obviously need a larger patch. Grab your metal straight edge and use it to frame the damaged spot, making sure you're giving yourself enough room to remove all of it.
Once you have a clear outline, it's time to cut. Press the straight edge down hard onto the carpet along one of your lines. With your sharp utility knife, make a clean, firm cut right through the carpet pile and the backing. Do this for all four sides until the damaged piece is completely free.
Don't rush this. A wobbly cut is a nightmare to match up later. Your goal is a perfectly neat square or rectangle with dead-straight edges.
The image below gives you a good idea of the initial checks you should be making before you start cutting.
This handy visual breaks down those crucial pre-repair checks, making sure you have a solid game plan before you get stuck in.
Creating the Perfect Donor Patch
Now that the damaged section is out, you have a perfect template. Lay this piece over your donor carpet, but stop and pay attention to the most important detail of the entire job: the pile direction. Carpet fibres all lean in a particular direction. Your patch will stick out like a sore thumb unless its pile is running the same way as the carpet around it.
How can you tell? Just run your hand over the carpet and the donor piece. It will feel smooth one way and rough against the grain.
- Line up your template on the donor carpet so the pile direction is an exact match.
- Once you're happy it’s aligned, use it as a guide to cut out the new patch.
- For a really snug fit, try cutting the patch just a fraction larger than your template—I’m talking a single fibre's width. That tiny bit of extra material makes all the difference for a tight, clean seam.
Pro Tip: Always do a 'dry fit' before you get the adhesive out. Pop the new patch into the hole to double-check the size, fit, and that all-important pile direction. It should sit snugly without being forced in, and the colour and texture should blend seamlessly.
Securing the Patch for a Lasting Fix
This is it, the final step: sticking it all down. This is where your carpet tape or liquid adhesive comes into play. Lay strips of your double-sided carpet tape on the subfloor, right around the edges of the hole, and press them down firmly.
Carefully peel the backing paper off the tape. Gently lower your perfectly aligned patch into the space, pressing it down from the middle and working your way out to the edges. The tape will grab it and create a strong bond, holding it tight. If you’re worried about the edges fraying over time, you can run a very thin line of seam sealer around them just before you place the patch.
Once the repair is done, good maintenance will keep your entire carpet looking its best. Our detailed guide on the professional carpet cleaning process shows how regular care can really extend the life of your flooring and help repaired areas blend in even better over time.
Finishing Touches for an Invisible Repair
You’ve got the patch fitted and secured, which is a huge step. But the real magic happens now, with the finishing touches that transform a noticeable carpet patching repair into a seamless, invisible fix. It’s all about blending the new piece so well that even you’ll have to look twice to find it later.
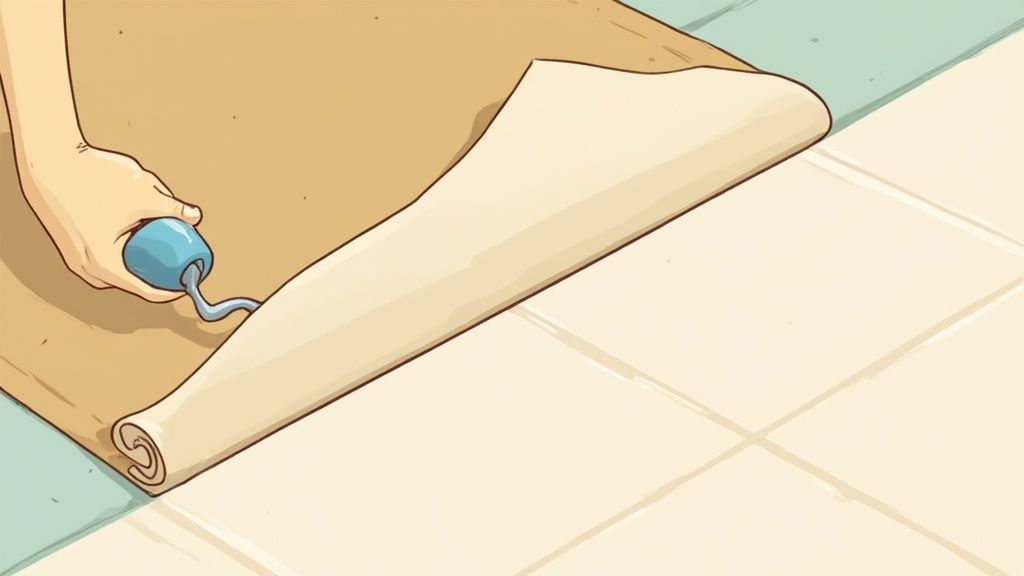
The first job is to tackle the seams. Even with a perfect cut, the join where the patch meets the original carpet can stand out. This is where a simple carpet roller comes into its own – and if you don't have one, the side of a smooth glass jar works surprisingly well in a pinch.
Roll firmly over the seams, coming at them from different directions. This action is crucial; it helps to mesh the fibres from the patch and the surrounding carpet, blurring that sharp edge and encouraging them to lock together naturally.
Blending and Grooming the Carpet Pile
With the seams pressed down, it's time to focus on the carpet's texture. Your patch has been handled and pressed into place, so its pile might look a bit flat or different from the area around it. A quick grooming session will sort this out.
Take a stiff brush or a carpet rake and gently fluff up the fibres on and around the patched area. It’s best to brush in the direction of the pile first, then lightly brush against it to lift everything up. This simple step helps the new section catch the light in exactly the same way as the rest of the carpet.
You might also spot a few stray fibres sticking up, looking longer than their neighbours. Whatever you do, don't pull them.
- Trim Carefully: Grab a sharp pair of scissors and carefully snip these rogue fibres so they sit level with the rest of the pile.
- Check All Edges: Pay close attention to the seam lines, as this is where you're most likely to find stray loops or fibres.
- Vacuum Last: Once you’re happy with the trim, give the area a final, gentle vacuum. This will pick up any loose clippings and help the fibres settle into their new home.
Adapting to Different Carpet Types
Not all carpets are the same, and your finishing technique needs to adapt accordingly. A dense, plush Saxony pile will blend very differently from a looped Berber carpet.
For a plush Saxony, you’ll want to spend a bit more time fluffing the pile to really make those seams vanish. With a looped Berber, you have to be extremely careful not to snag any of the loops when you're trimming. The aim is to tuck the patch's edge loops in right beside the original ones, not to cut them short.
The real art of an invisible repair lies in these final moments. It's about respecting the carpet's unique texture and encouraging the new and old sections to become one. Take your time, and the results will speak for themselves.
Knowing how to properly maintain a carpet is a valuable skill. The UK floor covering market is a significant industry, valued at around £2.49 billion and is expected to keep growing. This trend highlights a strong interest in maintaining and extending the life of home furnishings like carpets. You can find out more about this growing market on MarketReportAnalytics.com.
Even with a perfect patch, sometimes lingering odours from the original damage, like pet accidents, can stick around. For professional advice on getting rid of these stubborn smells, take a look at our expert guide on carpet cleaning for pet urine.
Knowing When to Call in a Carpet Repair Pro
While learning to patch your own carpet is a brilliant skill for small mishaps, there are definitely times when it’s best to put the tools down and call an expert. Knowing your limits can be the difference between a quick fix and a permanent, costly eyesore you have to live with every day.
Think of it this way: a small, clean burn mark on a plain carpet in the corner of a room is a perfect DIY job. But what about extensive damage covering a large area, or a cluster of smaller spots? That’s when you need the kind of precision that only comes with years of experience. A pro has the right gear and the know-how to make big jobs look seamless.
Complex Patterns and High-Traffic Areas
Patterned carpets are a classic example of where you really need a professional touch. Trying to align intricate designs, checks, or even simple stripes is a genuine art form. If you’re off by just a few millimetres, the patch will stick out like a sore thumb—often looking worse than the original damage. Professionals are masters at cutting and placing patches so the pattern flows without a single interruption.
The same goes for repairs in high-traffic zones, like right by the doorway or in the main walkway through your living room. These spots are under constant stress from footfall. A professional will use industry-grade adhesives and techniques to make sure the patch stays put, without any lifting or fraying at the edges. It’s all about getting a durable, long-lasting fix.
When the Damage Runs Deeper
Sometimes, the problem isn't just on the surface. If your carpet is delaminating—that’s when the secondary backing starts separating from the primary layer—a simple patch just won't cut it. You're dealing with a structural issue that needs an expert eye.
Significant water damage is another major red flag. This often requires specialised drying equipment and a proper look at the subfloor to prevent nasty mould and rot from setting in. A professional can assess the full extent of the problem and carry out a comprehensive repair that protects your home and your family's health.
It’s clear that there’s a strong demand for professional carpet care, not just in our homes but in businesses too. Many UK companies are switching to modular carpet tiles precisely because they’re easier to repair, and you see skilled flooring maintenance teams in high demand for public sector jobs. It just goes to show how much value is placed on making a carpet last through expert repairs.
Ultimately, hiring a pro is about peace of mind. While we're focused on carpet patching, remember that other home improvement jobs, like significant drywall repairs, are also often best left to the professionals. And for tricky issues like stubborn odours from pet damage, an expert is essential. To see how the pros handle that, have a look at our guide on pet urine carpet cleaning.
Common Questions About Carpet Patching Repair
Even with the best instructions, you’re bound to have a few questions when you tackle your first carpet patching repair. That's completely normal. Getting these details right is what separates a good job from a great one, so let’s run through some of the most common queries that crop up.
Having a plan for these little hurdles will give you the confidence to achieve a truly professional-looking finish. From sourcing a donor patch to knowing how to look after your repair, we've got you covered.
What If I Have No Spare Carpet for a Patch?
This is probably the number one question we get asked. If you don't have an offcut left over from the original installation, it’s time to get a bit creative. Your best bet is to find a piece of the original carpet from a spot that no one will ever see.
Think about places like:
- Inside a built-in wardrobe or an airing cupboard.
- Under a heavy, permanent piece of furniture like a bookcase or sofa.
- In a corner that’s always going to be hidden from view.
You can carefully cut the donor piece you need from one of these hidden areas. Since that spot isn’t visible, you can replace it with a close-but-not-perfect remnant from a carpet shop, or even leave it bare on the underlay if it's completely out of sight.
How Do I Get the Pile Direction Right?
Aligning the pile direction is absolutely essential for an invisible repair. Get it wrong, and the patch will catch the light differently and stand out a mile, no matter how perfect your cuts are.
To find the direction, simply run your hand across both the main carpet and your donor piece. The fibres will feel smooth one way and a bit rougher when you go against the grain. Before you even think about applying adhesive, do a 'dry fit' by placing the patch in the hole and rotating it until the texture feels and looks identical to its surroundings.
A great tip from the pros is to draw a small arrow on the back of the carpet (next to the hole) and a matching arrow on the back of your patch before you cut it. This ensures you can align them perfectly every single time.
How Long Before I Can Vacuum the New Patch?
Patience is definitely a virtue here. After you've completed the carpet patching repair, you have to give the adhesive plenty of time to fully cure and form a strong, permanent bond.
Avoid walking on the newly patched area for at least 24 hours. To be on the safe side, wait a good 48 to 72 hours before you even think about vacuuming. The powerful suction from a vacuum can easily lift the edges of a patch that hasn't fully set, undoing all of your hard work. It's a good idea to place a small object over it as a visual reminder.
For damage that's more than a simple patch, like scorch marks, you can check out our detailed advice on how to get burns out of carpets.
For complex repairs or when you need a guaranteed flawless finish, the team at AG Carpet Specialists is here to help. Contact us today for a free quotation and let our experts restore your carpet to its former glory.


